Learn To Draw DollfIsh Drawing Step By Step
Sketchytips.com provides instructions on how to draw dollfish, step by step. If it's your first attempt, then don't worry; here is proper guidance for you.
Today I'm going to teach you step by step how to draw a dollfish. Dollfish is the most beloved fish in the marine world. I enjoy sketching dolls because it's so easy to do. If you are having trouble making a dollfish then don't worry because I am here to teach you basically in this tutorial I am going to teach you how to make a dollfish easily using basic shapes. By using basic shapes we can create anything. It doesn't matter what it is - a cat, a human body, a car, a house, an animal or something else - shapes are the only thing that can be used to create any image. And by using them we can identify anything easily. To fully understand this, turn your face towards your room, you will see that everything in your room is made of shapes. For example, your fan is made of circles and straight lines, your table is made of straight lines, and even your pencil is made of basic shapes. If you look at a portrait or other reference image, and you want to sketch it in your sketchbook, first analyze what you can see in the image and find the basic shapes in the reference image and then draw it. Shapes help illustrate the structure of any object. So, in this tutorial, we will sketch a dollfish fin using simple shapes. So let's get started now!
Material used in this tutorial:
- Paper
- Eraser
- Sharpener
- Pencil/pen
Lesson Summary:
Dollfish drawing is divided into a few steps that serve as a summary.
- Draw a circle for the dollfish's head.
- Use the circle to draw the dollfish's body.
- Sketch a circle to represent the dollfish's tail.
- Draw another circle to represent the dollfish's nose.
- Connect the circles for the body, tail and nose.
- Draw the dollfish's wing.
- Draw the bottom tail of the dollfish.
- Sketch the dorsal fin of a dollfish.
- Remove all arbitrary rules.
- Sketch the dollfish's smile and eye.
- The sketch of the doll is completed now.
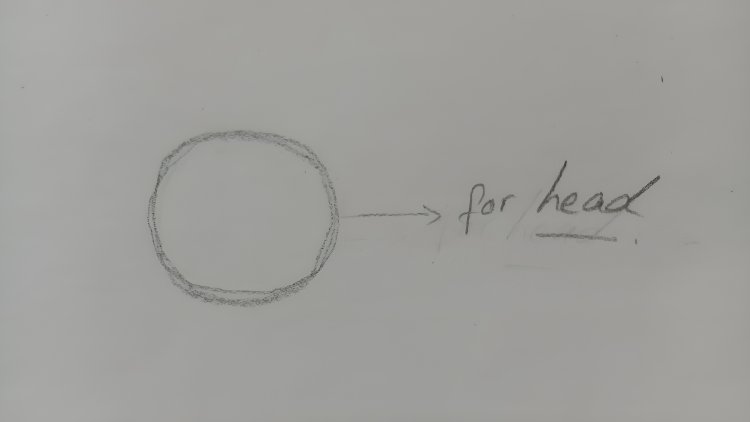
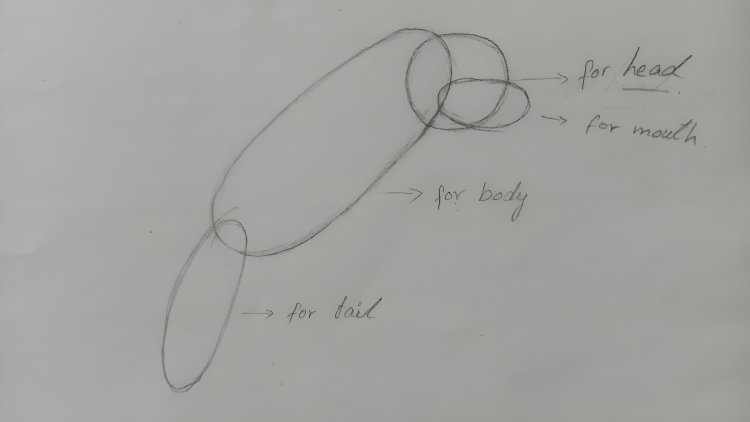
Step 1: On the left side of the paper, draw a circle for our first step. Actually, this circle represents the doll's head. Since the head is an important part of the body, we should draw the head first. I always start any drawing from the head.
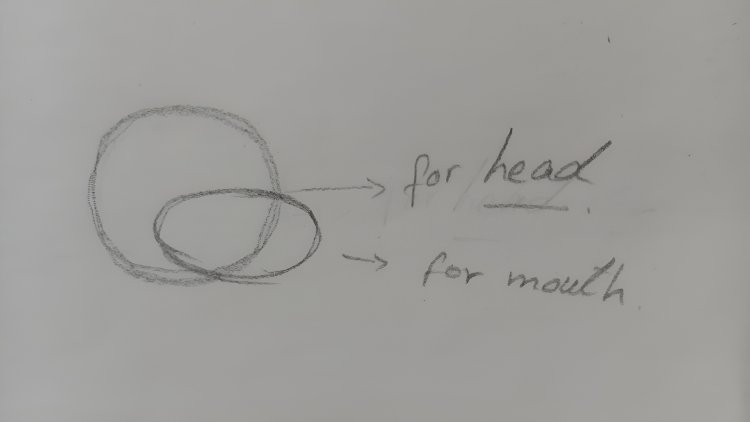
Step 2: On the previous circle from step 1, draw another circle to the left. The mouth of the dollfish's is represented by this circle. You can see that the main body of the dollfish is designed to follow circular principles.
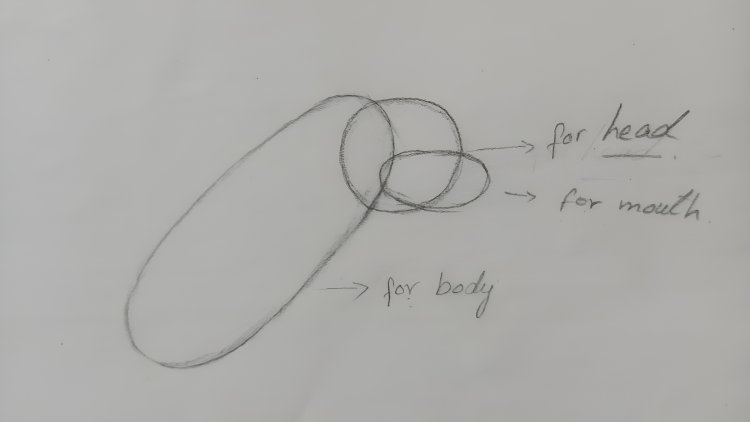
Step 3: On the previous circle, draw another circle in this step. It is bigger and taller than the previous circle. This circle symbolizes the dollfish’s body. This circle is to be used to represent the body of the dollfish.
Step 4: On top of the previous circle, draw a new circle in the fourth step. Compared to the previous circle, this thread should be longer because it is part of the tail of the dollfish.
Very important: Since we may erase the lines during later steps, draw all the guidelines with a light pencil.
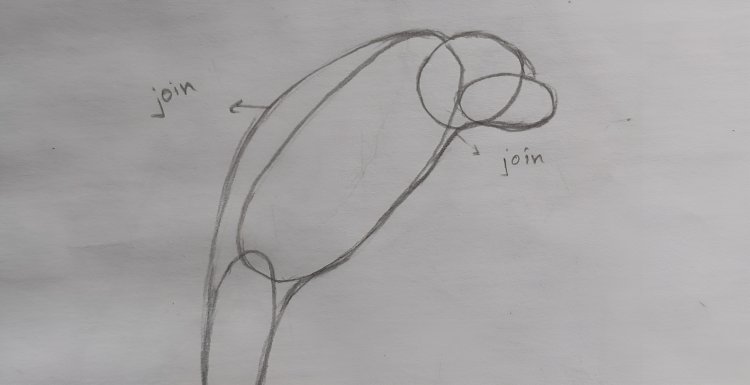
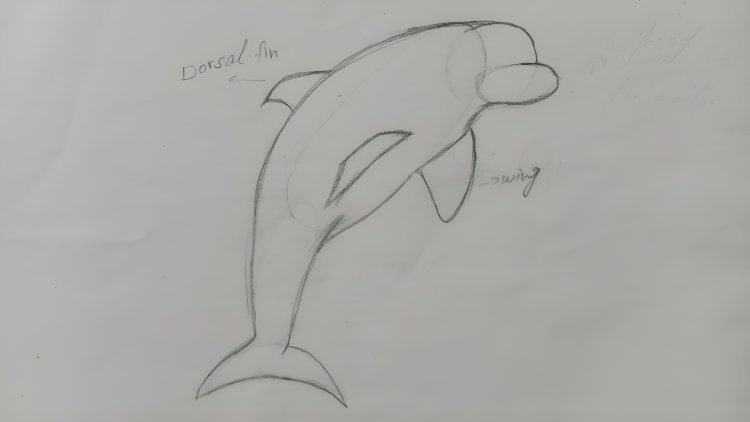
Step 5: Using these instructions, join the body, tail and mouth circles together in step five and give the dollfish its proper structure. Draw it exactly how the picture shows.
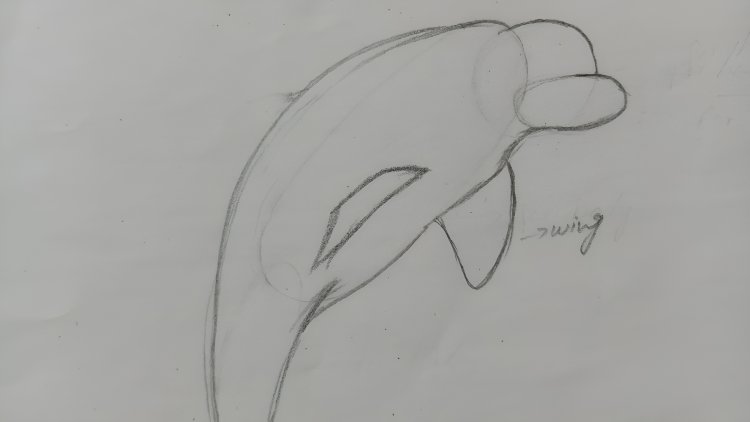
Step 6: Using the incised lines, outline the fins of the dollfish in this final step. You can look at this picture and draw it if you don't understand what I'm saying.
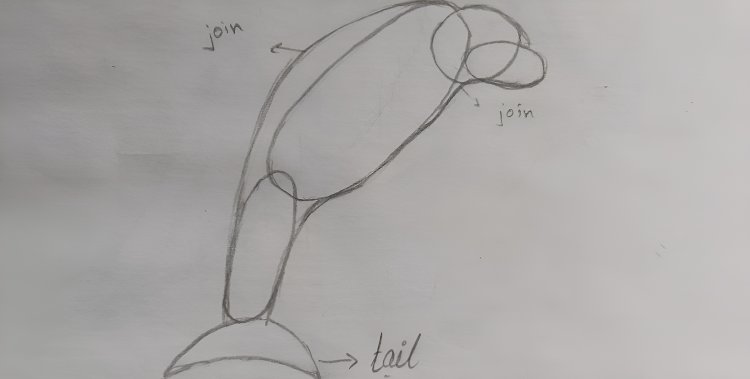
Step 7: In step seven, use the carved lines to reveal the doll's tail. Make it like I have in this picture
Step 8: Draw the dorsal fin of the dollfish in this final step. The dorsal fin of the dollfish adds to its aesthetic appeal. Draw it exactly how the picture shows.
Step 9: Remove all unnessary instructions lines in this step and use a small circle to represent the dollfish's eye, and in this final step use a carved line to represent the dollfin's cute smile.
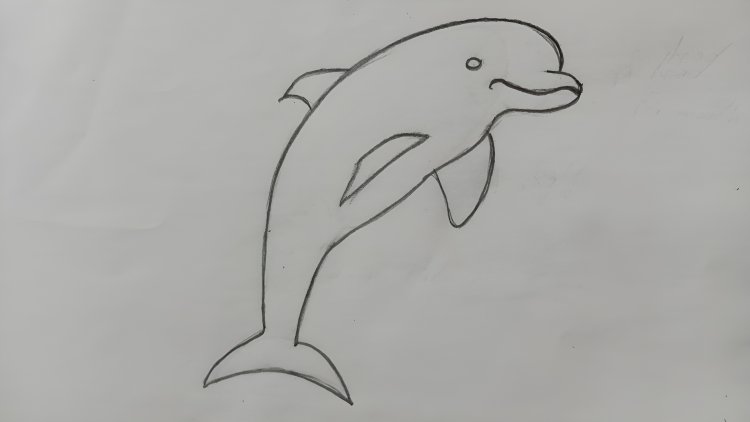
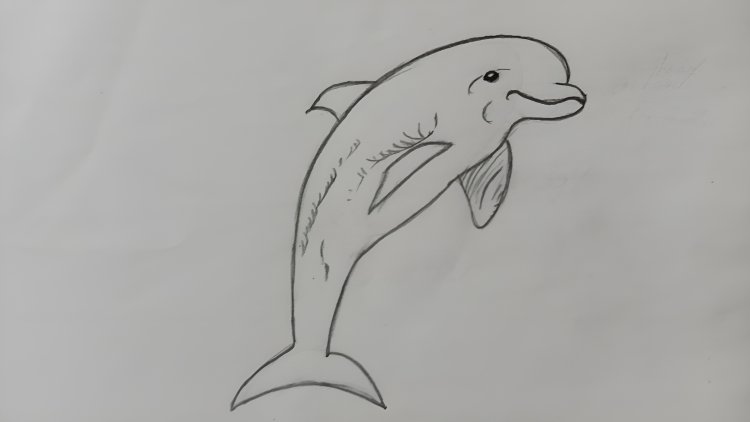
Step 10: Draw some fine lines to make our dolphin more realistic.
Our dollfish sketch is now complete.Keep in mind that practice makes perfect. If your initial attempt doesn't go exactly as you had hoped, don't give up. Your drawing skills will advance if you continue to practice.
What's Your Reaction?