How To Sketch Eyes For Beginners
Sketchytips.com provides how to sketch human eyes step by step. If it's your first attempt, then don't worry; here is proper guidance for you.
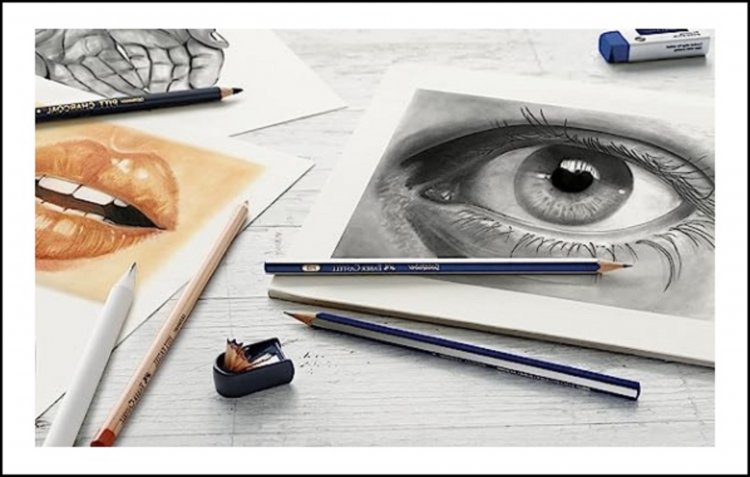
Gear Required for Studying to Attract Eyes:Get the right gadget for the activity before you begin learning How to draw eyes. Maximum professional artists utilize the following tools to supply sensible drawings: An H pencil: The letter "H" stands for "hard," indicating that those pencils have a firm lead. You need to use an H pencil to begin with, since it leaves a very mild imprint on paper, making it best for outlines and easy shapes. A 4B pencil: The softest lead kind is "B," or "black," and you ought to use this kind of pencil to attract darker shadows that decorate the realistic appearance. An "HB" pencil stands for "difficult black," and between "H," the hardest form of lead, and "B," HB pencils, which can be the softest, are inside the middle; they're taken into consideration "medium tough" and are the greatest alternative for finer information and softer shadows. Kneaded rubber to convey the information and attach the mistakes. Micro-perforated comic strip paper that facilitates revisions. It is completely acceptable if you decide to use virtual drawing gear. It is vital that you recognize a way to use that equipment and system to provide practical work.
The Fundamentals of Drawing Eyes:
Understanding the fundamental eye forms is step one in learning to attract eyes. By beginning with the fundamentals and using your manner as much as the information, you can establish a solid framework in your drawing and keep away from the demanding situations that the majority of novices stumble upon when trying to draw with a practical eye. It may be tough to attract a human eye, but with training and a step-by-step method, you could get the correct effects. Here is an academic article on drawing a human eye: Collectively, let's tackle this one step at a time.
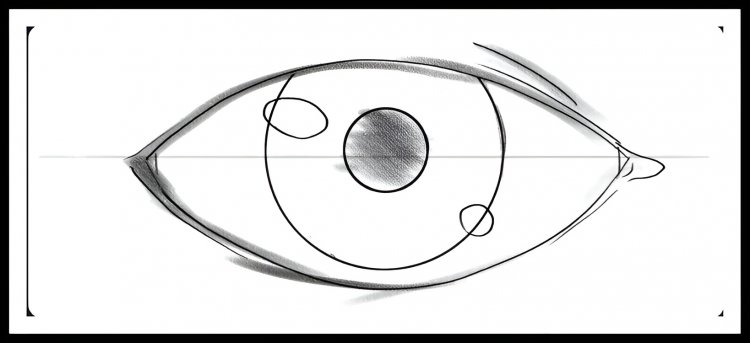
Step#1:
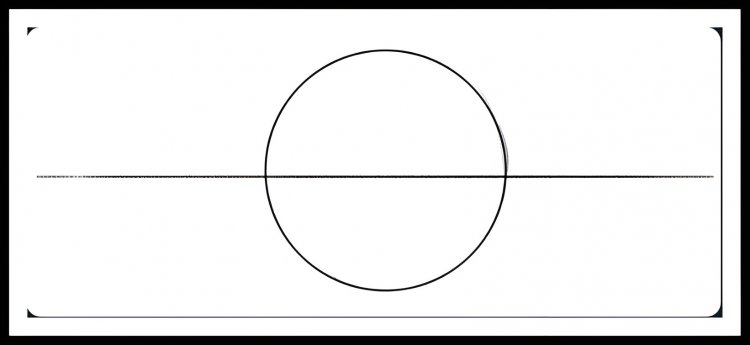
Make an IRIS: While you look someone in the eyes, what do you immediately become aware of? Most likely, it's the hue of their eyes. So let's start by drawing the iris' attention. Draw a tiny circle or oval for the iris inside the outline of the main shape. Leave a tiny hole at the pinnacle of the iris to reveal the mildly mirrored image. A fun reality about your irises is that they have 256 distinct traits, but your fingerprints only have more or less forty. Now draw a circle with your H pencil by lightly pressing it. If your circle's shape is not ideal, do not panic; at this point, it is best to define it, and you can regulate any flaws later. After that. Subsequently, hint at a prolonged horizontal line via the center of the circle. The outer and internal corners of the eyes have to be indicated by the line's ends, as proven right here.

Step#2:
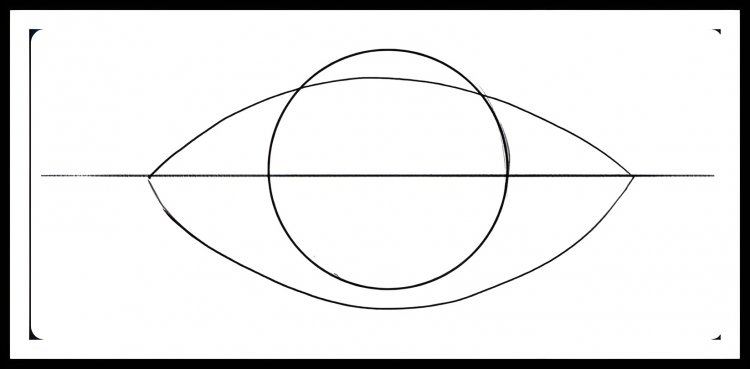
PENCIL in the EYELIDS: Draw a curving line that starts on the internal nook of the eye, touches the iris's top, and ends at the outdoor nook. This could be the crease on the pinnacle of the top eyelid. Eyelids drawn up To make the higher and lower eyelids, draw curving traces above and below the eye. Depending on the expression you want to deliver, the curvature of the eyelids can change. Then, draw a second line that hits the iris's base and bends upward so that it terminates at the outer nook of the eye. The decrease in lid is recognized by using this line. Let's now cartoon the lower part of the higher eyelid. Yet again, you must join the corners of every eye together with the use of The use of a curved line, but this time ensuring the line covers the tiny phase of the iris: To attract eyelids, draw curving strains from one corner of the eye to the other. You've now completed the basic definition of attention. The learner needs to be covered.

Step#3:
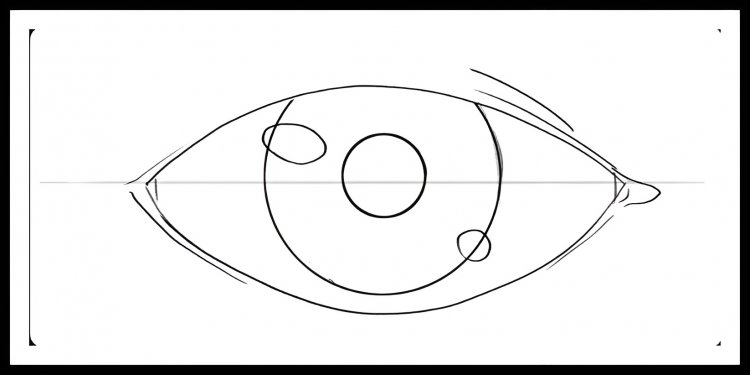
Add the scholar:, A circle approximately two times smaller than the iris makes up the pupil. Another time, don't worry about developing an approximately faultless circle. Make a smaller circle for the scholar within the iris. Depending on the lighting, Simply ensure the iris' edges are calmly spaced aside on every side of the scholar. After you've completed drawing the fundamental additives of the eye, you may emphasize the eyelids, pupil, and iris by going over them with a harder pressure. Then, to add the carbuncle, a quick line must be drawn from the top to decrease the lash line in the internal corner of the eye. Your eye's internal corner If you'd like, you can also depict how the light reflects in the eye by drawing an iris with a round and oval shape, as seen in the instance underneath: A student is created by drawing a smaller circle within the iris. Additionally, you could put off making use of the light reflection until later. The outline in your eye drawing is now complete. The subsequent step is to add information to it so that it appears practical.
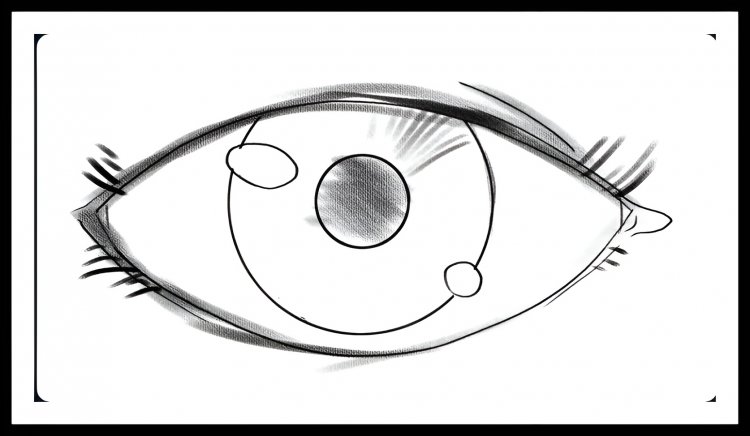
 The way to add information to your eye drawing in 2 steps:
The key is to best-music the information and punctiliously tint your layout with the intention of creating an eye-catching drawing that looks practical.
Step#1:
Draw the top lash line while shading the pupil. Deliver the iris with more specifics. Draw radial strains, which are narrow and go from the center to the perimeter of the iris. Those strains supply the texture and function of the iris fibers. First, let's darken the scholar. Now that you have your caricature, you can add diffused shadows with an HB pencil. In the same manner that Gonçalo did, you can similarly darken the whole scholar: Take an HB pencil and begin stippling! The strains need to then be slightly darker by way of going over the eyelids once more with a softer lead. As well as doing this, let's add the higher lash line by positioning it below the crease and dispose of the part of the iris that crosses the higher eyelid.

Step#2:
Cover the IRIS should then be shaded. Provide the iris with extra specifics. Draw radial strains, which might be slim and cross from the center to the fringe of the iris. These lines provide the attention-grabbing texture and serve as an illustration of the iris fibers. However, if you haven't already, draw the reflection of the light to your attention before you start working on it. Make your drawing replicate light to give the eyes a more lifelike look! Gonçalo leaves the highlights white but hues the distance surrounding them. To thicken the attention's outline, he keeps overlapping a number of the strains. Use the pencil to darken the eyeball while applying mild strain to give the eye more size. You're able to do it. Really, by adding a small amount of shading to the outer eye nook and the top of the iris, To avoid having abrupt transitions among lighter and darker colors of the primary coloration, mix after you've completed coloring.
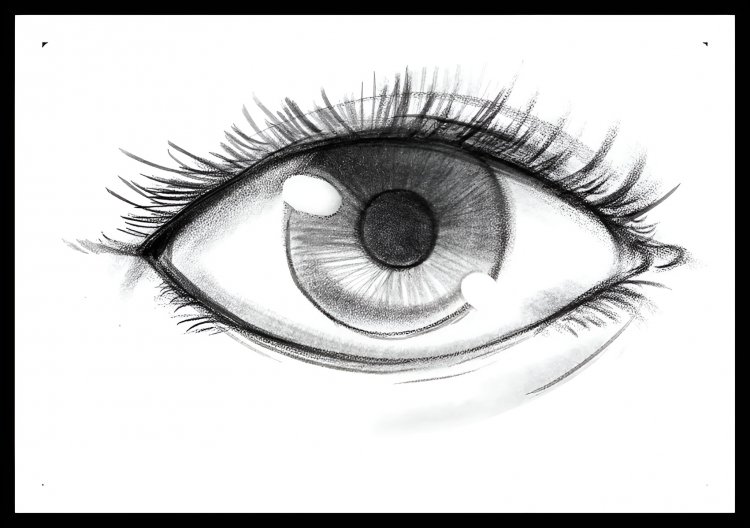
Final details for Drawing Eyes:
The final touches
If further information are wanted, which includes strains around the eyes, creases in the eyelids, or shadows on the pores and skin around the eyes, you can upload them. Those details can enhance the drawing's realism.
Your eye drawing still doesn't appear very realistic right now. However, this is about to change.
Step#1:
INCLUDES EYELASHES: Draw a series of short, curving strains flowing outward from the pinnacle eyelid to suggest the eyelashes. As you stroke the outer nook of the eye, gently prolong the lashes. Make the decreased lashes less noticeable and shorter. Do not forget to draw the top lash line. The moment has come to feature eyelashes. Make small, brief movements with your hand to represent the eyelashes. Make no attempt to equalize their lengths. As long as there aren't any obvious variations in the duration of the lashes, it's fine if some are slightly longer than others. To present your drawn eyes' intensity, upload a few eyelashes! Additionally, you can upload the decreased eyelashes. You may tell we did not draw something. Best in the corners, alongside the whole decrease lid.
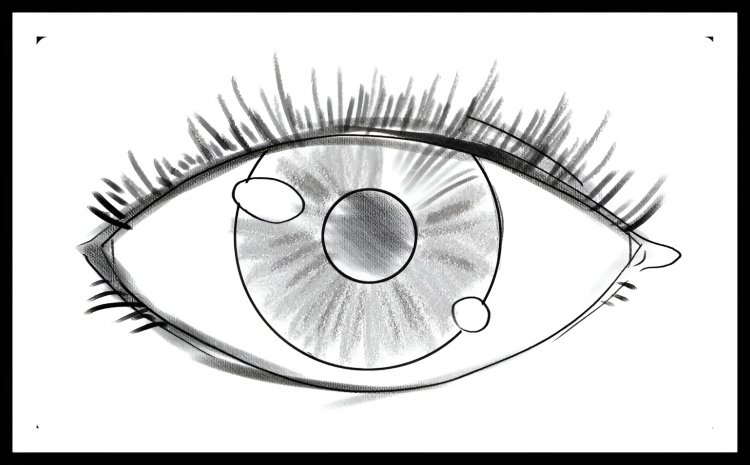

Step#2:
DEEPEN YOUR EYES :Pick up a 4B pencil right now, and let's finish drawing your eyes. Reread every word to make it stand out, paying close attention to the iris specifically. Due to the fact that the higher lid casts a faint shadow over it, boom, the quantity of blackness at the top of the iris darkens the iris's margins as well. Let's give the iris some shape after that. Draw quick, curved, and immediately emerging lines like this:

Let's create lines that emerge from the pupil to give the iris shape! Draw a line above the crease and another underneath the lower lid to symbolize the eye socket and give your drawing of an eye even more depth.

Take into account that sketching is a talent that improves with instruction. If your preliminary attempts aren't ideal, don't surrender. To create your very own style, keep attempting new techniques and working towards them.
What's Your Reaction?