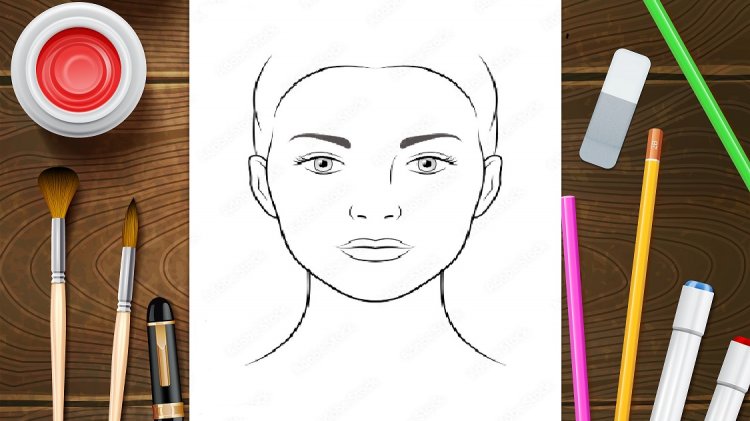
HERE IS THE COMPLETE GUIDANCE TO DRAW A FEMALE FACE USING THE LOOMIS METHOD.
Sketchytips.com provides how to draw female face step by step. If it's your first attempt, then don't worry; here is proper guidance for you.
This article provides a comprehensive guide to achieving professional-level proficiency in drawing a female face. While beginners may often observe accomplished artists effortlessly sketching face portraits without any apparent need for guidelines or techniques, it is important to remember that these artists possess extensive experience and have diligently practised their craft over time. However, there is no need for discouragement, as it is entirely possible for beginners to attain such artistry with sufficient practise and dedication. For novices, it is imperative to begin by using guidelines when drawing. In this regard, the Loomis method serves as the fundamental framework for such guidelines. By familiarising themselves with and adhering to this method, aspiring artists can establish a solid foundation for their artistic journey towards mastering the art of drawing realistic female faces.
The Loomis method, created and developed by renowned American illustrator Andrew Loomis in the 1940s, remains an essential approach for artists when depicting faces. Its popularity and widespread adoption within the artistic community signify Loomis' unrivalled expertise in this field. Today, we embark on a step-by-step tutorial on drawing a female face using the Loomis method. Let us commence this instructional journey.
Article Overview:
The Thirteen Steps to Drawing the Female Face Mastering the art of drawing a realistic female face requires a step-by-step approach. In this article, we will guide you through the thirteen essential steps to creating an accurate portrayal of the female visage while also providing valuable insights into the placement of facial features.
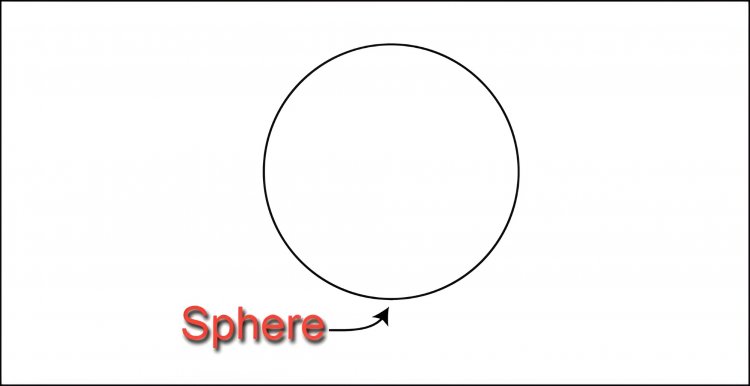
- Begin by drawing a perfect circle as the foundation for the face.
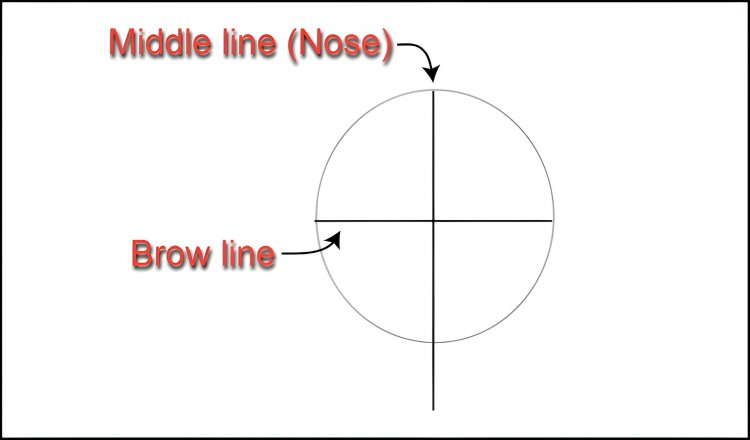
- Draw horizontal and vertical lines across the circle to divide it into four equal pieces.
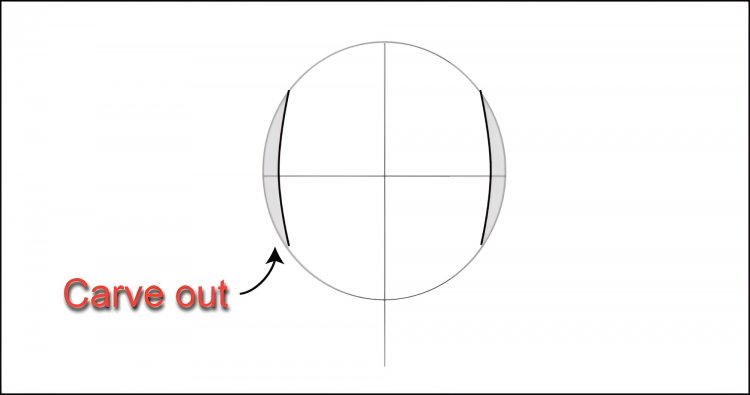
- Progressing from step 2, delicately shape the sides of the circle with a gentle curve, establishing the elegant curvature of the face.
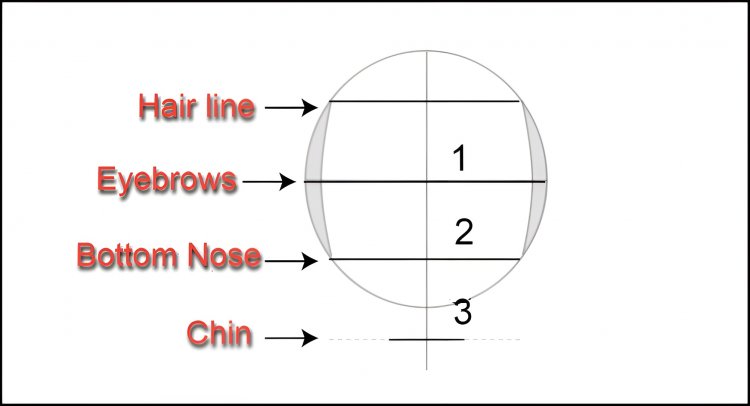
- Add critical facial landmarks by drawing the hairline, eyebrow line, bottom line of the nose, and chin line.
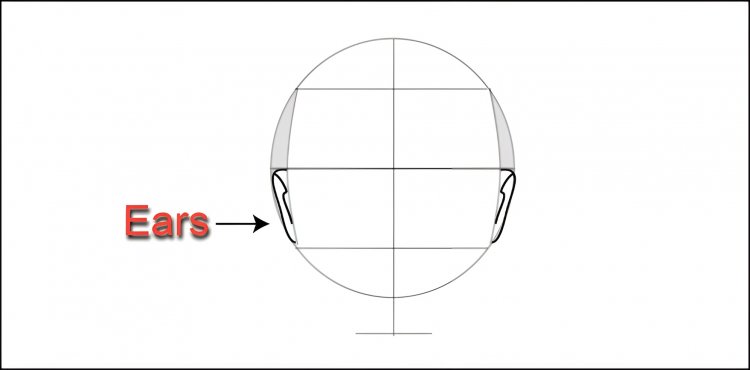
- Include the ears with meticulous attention to detail, capturing their unique shape and positioning.
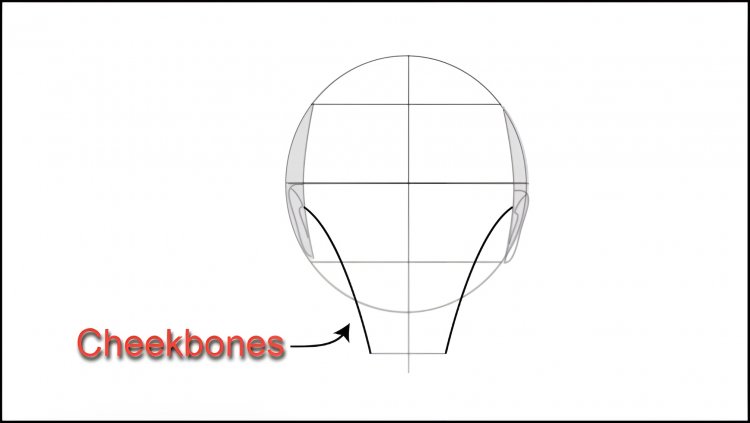
- Indicate the cheekbone lines to accentuate the facial structure and create a realistic portrayal.
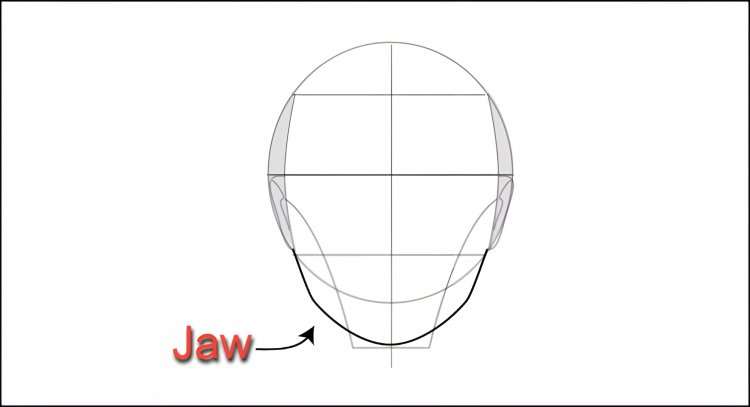
- Define the jawlines of the face, giving it a well-defined and captivating contour.
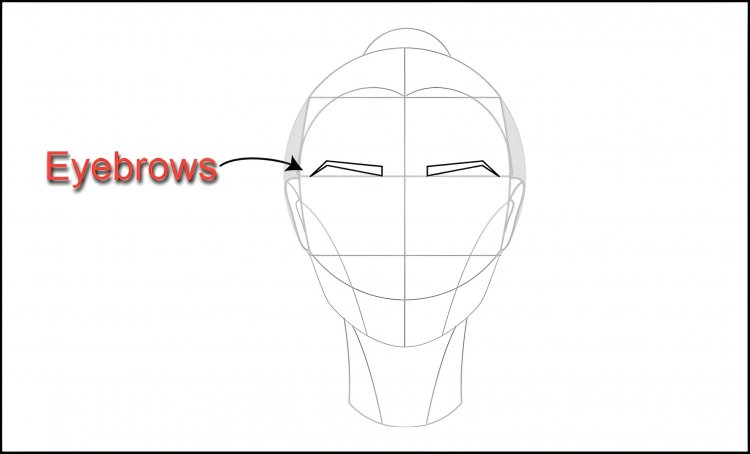
- Skillfully sketch the eyebrows along the previously established eyebrow line, ensuring proper shape and proportion.
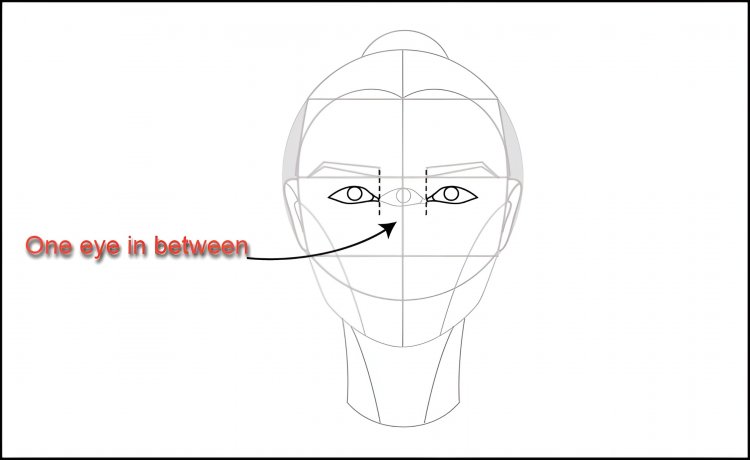
- Draw an eye slightly below the eyebrows, capturing its intricate details and expression.
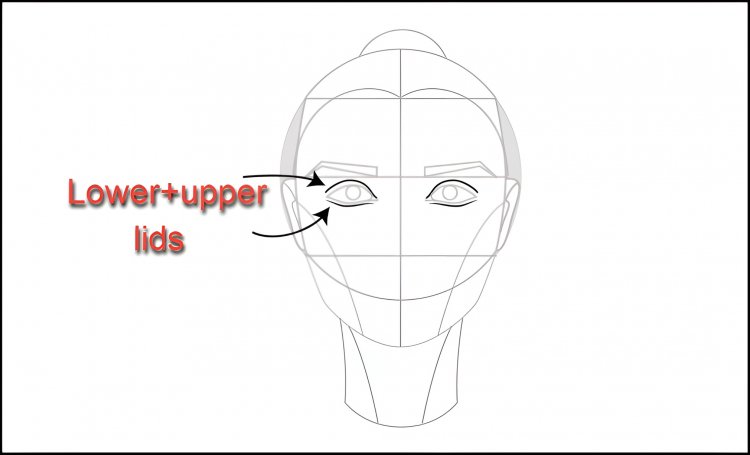
- Proceed to depict the upper and lower eyelids of both eyes, reflecting their natural curvature and lifelike appearance.
- Carefully render the nose, taking cues from the eyebrow line for accurate placement and proportion.
- Forge the centre line of the mouth, using the bottom curve line of the initial circle as a guide.
- Lastly, skillfully portray the top and bottom lips by following the central lines, bringing the face to completion through the addition of this crucial feature. With the execution of these thirteen steps, your drawing of a female face will be brought to life, showcasing your artistic prowess and attention to detail.
DRAW ALONGSIDE ME NOW. AND TEACH YOURSELF TO DRAW THE FACE AND FACIAL FEATURES OF WOMEN.
Let's now get going.
Step#1:
The following step is to draw a circle. If you can't make a circle properly, it doesn't matter. As long as you try,you can.
Step#2:
Cut the circle in this step using straight lines both horizontally and vertically. The eyebrows' guideline is represented by the horizontal line.
Step#3:
In this step, cut the circle's tiny slices from the left and right sides. It is the region on the face where the ears are drawn.
Step#4:
I marked the circle with three lines of equal length. The bottom line of the nose is the third line from the top, followed by the second and third lines for the eyebrows. Additionally, add another line to the bottom of the entire circle. It is the chin line.
Step#5:
In the third step, draw ears underneath the curved lines.
Step#6:
Along with a curved chin line and eyebrow line, draw cheekbone lines.
Step#7:
On the face, draw the jaw. It is outlined on the chin lines on the upper side.
Step#8:
On the brow guidelines, draw eyebrows.
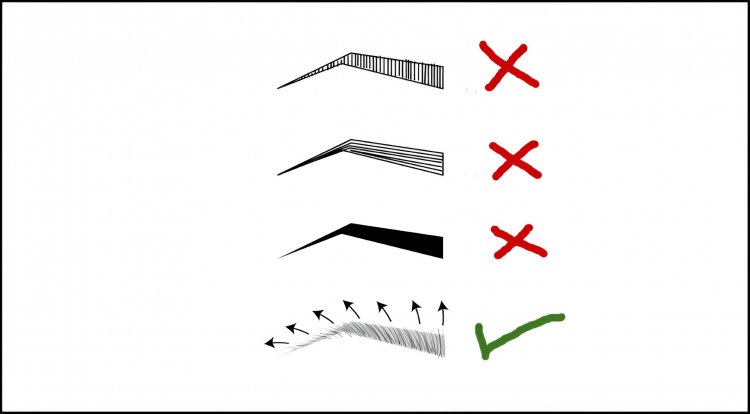
Eyebrow shading tips: A straight line cannot be used to shade the brows. because it looks wired and unattractive.
It looks awkward to shade the brows with horizontal lines.
Always begin drawing stroke lines by drawing straight lines. And slowly bend it in the direction of your eyebrows. As shown in the illustration, if you are drawing an eyebrow on the right side, you can bend the strokes into the right side, and if you are drawing one on the left, you can bend them into the right side.
Step#9:
Make a face with an eye. The distance between the two eyes is also equal. With the third eye in the picture, I can see it. You can click the link below if you want to learn by the eye in depth.
Creating eyes
Step#10:
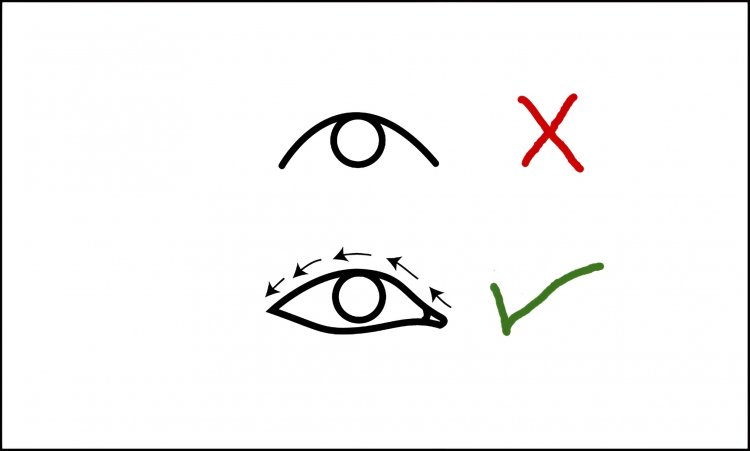
Small, curved lines should be used to represent the eyes' upper and lower eyelids. As seen in the illustration, draw the eyes' eyelids.
- The Right Way TO Draw Eyes
There is a mistake that newcomers frequently commit. It will show you how to fix this error.
New artists always draw like this. They are correctly depicted as curved lines. The biggest error has been made. - Always draw a curve line with the centre point at the end and the starting point at the beginning.
In these illustrations, I depict how to look at eyes correctly and incorrectly. Look at these pictures and try to grasp what I'm saying. -
Step#11:
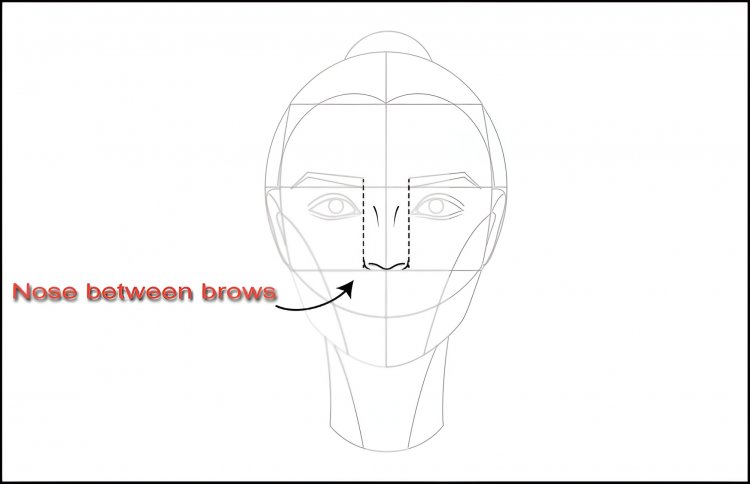
Make a nose by measuring the space between the two eyebrows and drawing it there. As shown in the illustration, draw the nose outline.
Step#12:
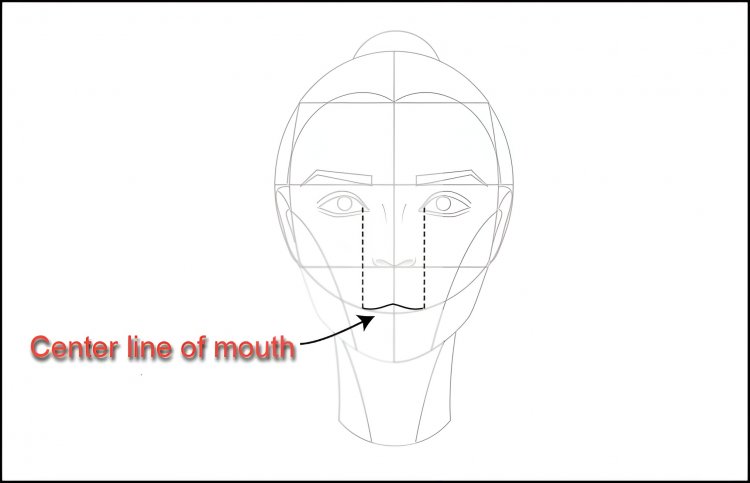
Draw the mouth's line using the circle's bottom side.
Step#13:
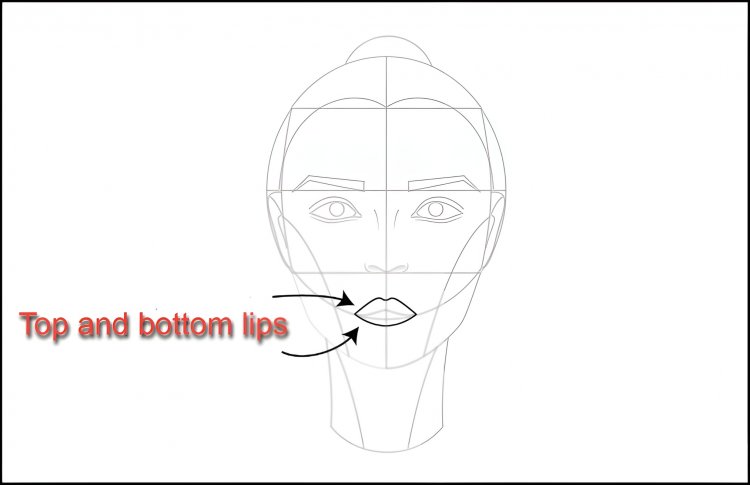
Using the mouth's midline as a guide, draw the top and bottom lips.
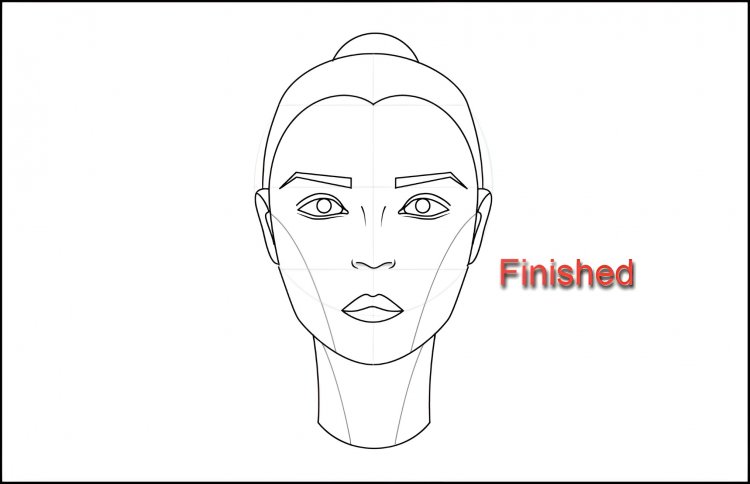
Step#14:
The completion of our female face is achieved by expertly emphasising the facial lines.
What's Your Reaction?