How To Draw An Anime Face From Different Angles And Directions
Sketchytips.com provides how to draw anime and manga faces from different angles and directions, step by step. If it's your first attempt, then don't worry; here is proper guidance for you.
In this article, I'll go into great depth about how to draw an anime face from three different perspectives. I've always enjoyed drawing, and I've tried my hand at everything from people to fruits to architecture to flowers to even other people. However, I must confess that anime art occupies a special space in the realm of art. It is fair to claim that because it has a unique calibre of creativity and recognition, it is one of the most well-liked art forms in the entire world. There are many different types of anime, including ones that are charming and lovable, appealing and gorgeous, and even those that appear to be very strong and powerful. You should read this article if you want to learn more. drawing anime style. When you try to sketch, you can discover that your creations lack a finished appearance since the face elements are not positioned appropriately. As a result, your drawings lack a pleasing aesthetic and seem weird, like the kind of drawing done by young children. If you want to improve at drawing this kind of anime face, it's essential to learn the proper positioning for the eyes, mouth, hair, and other facial elements. Your artistic abilities will be greatly improved by understanding these principles, and I'm here to help you do that.
You must carefully follow my instructions and fully comprehend them if you want to improve your drawing abilities. You will undoubtedly succeed if you carefully follow my advice. Observe and improve your artistic skills. Let's start this learning journey right away.
Warm UP YOUR HANDS FOR DRAWING OR SKETCHING BEFORE BEGINNING OUR LECTURE:
You can gain a lot from drawing skill improvement in a number of ways. I'll explain the warming process to you now as one useful way to improve your drawing skills. Warming up your hands properly is crucial before starting any drawing or sketching session. There are a number of exercises you can do to achieve this. Below, I'll go over a few of these exercises that will help you comprehend and put a suitable warm-up routine into practise.
Grab a piece of paper and a pencil to start this task. On the paper, start by drawing an endless, continuous circle. Don't be concerned about its shape because it doesn't have to be perfectly rounded. Up until the paper is completely filled, keep drawing circles. Remember, you only need one stroke line to complete this. Repeat the process on three different pages if one is insufficient. I am aware that this may be difficult, and you also have hand fatigue. If so, pause for a moment before continuing your practise. When it comes to drawing, I can see how you might be initially frustrated, but it's important to remember that this is just the beginning of your artistic journey. You might not know how to gradually improve your drawing abilities and speed over time.
Once you've completed drawing the three pages of circles, you may now draw as many vertical lines as you like on your paper. One piece of paper can be used to draw all of these lines. I am aware that at first you may find this task tedious, but I can assure you that you will gain a lot from it. This activity serves a purpose, so it's crucial to incorporate it into your daily routine.
Drawing anime faces in various angles and directions can be a challenging task, but with some guidance, you can master this
Now that you have warmed up and prepared yourself,
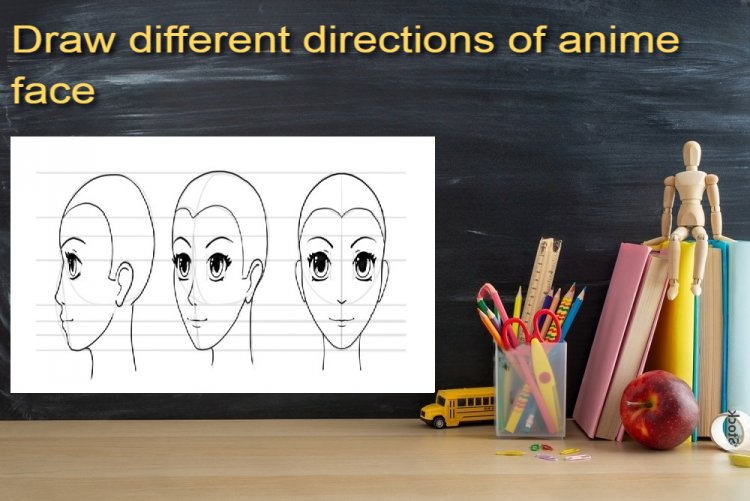
it is time to move on to the next step, which is learning how to draw the face of an anime character. Specifically, in this section, I will guide you through three different angles from which you can draw an anime face: the front view, the 3/4 angle, and the side view. These angles will provide you with a comprehensive understanding of how to portray the face of an anime character. Let's dive into it and begin the lesson.
MATERIAL
- Paper
- Pencils or pens,you take any number of shades
- Eraser
- A paper stump or any tool for blending
Step 1:
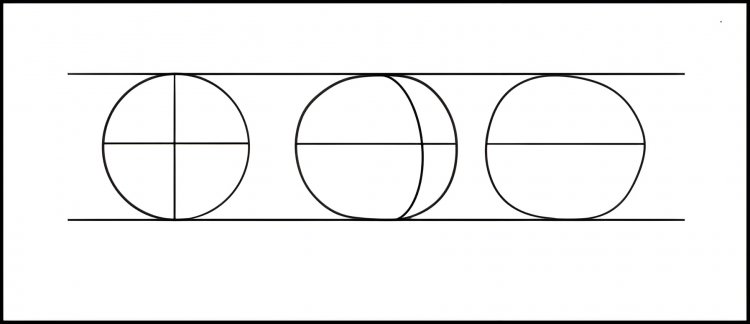
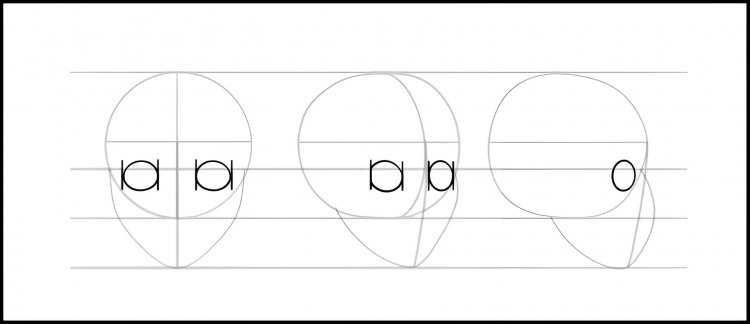
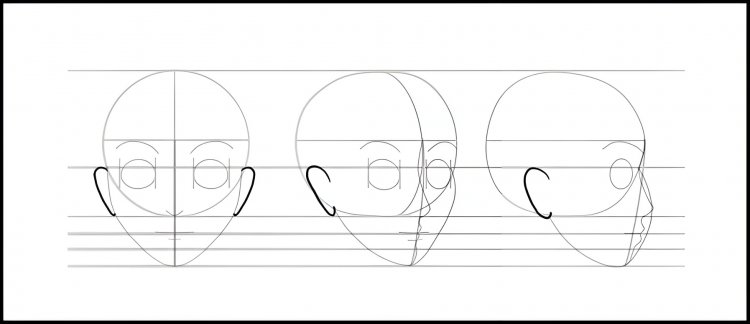
In order to accommodate simultaneously drawing three different angles, it is crucial to first draw three circles that are each the same size. While the second circle requires the addition of a curved line, the first circle depicts the overall shape. A straight line is drawn to show the direction in which the head or face is turned in the third circle. As a foundation for the subsequent drawing step, these lines also serve as a guide for the positioning of the nose and lips. Explanation: By putting more emphasis on the significance of drawing three circles that are the same size and outlining how each circle contributes to the drawing of different angles,
The eyebrow's guideline is actually a single horizontal line in the centre of the circle.
Step 2:
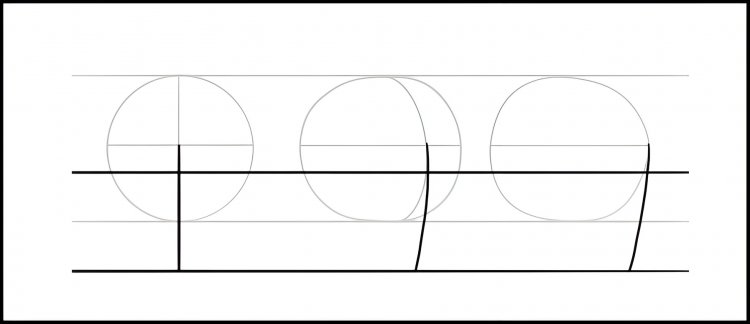
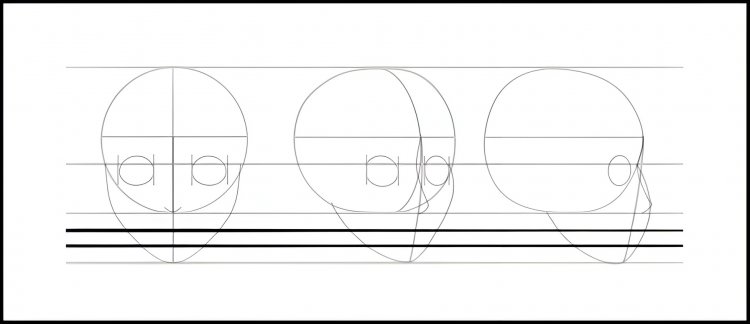
Drawing a straight horizontal line from the lowest point of the circle's centre is a crucial step in accurately sketching a face. We can now draw additional lines precisely by measuring the length of this line from the top of the circle. We should then proceed to draw a complementary line at the bottom of the circle based on our measurements. The placement of the chin and the length of the face as a whole are both determined by this particular line.
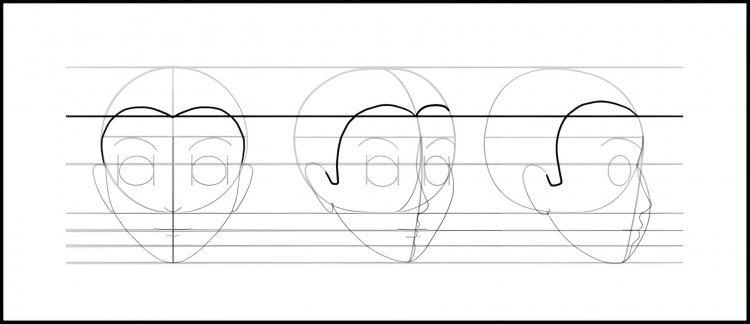
Step 3:
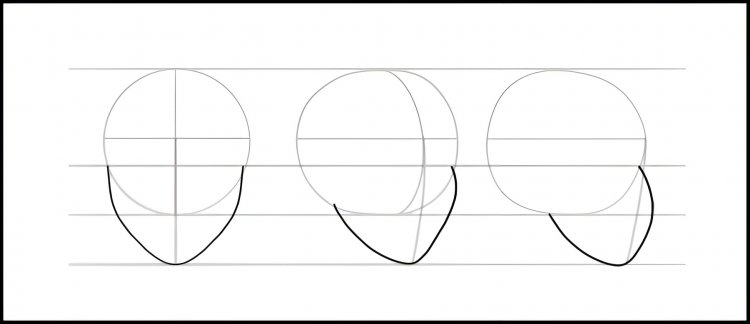
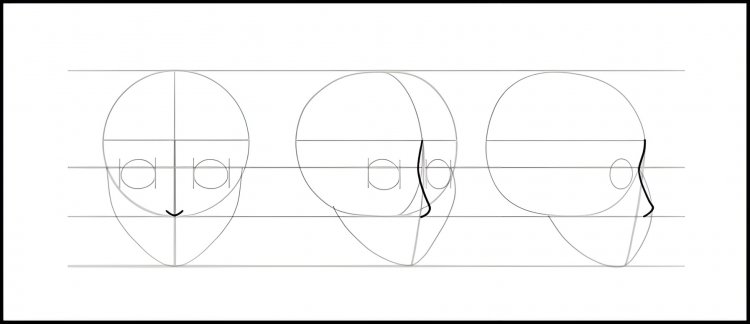
As shown in the illustration, use the circle and middle vertical line to draw the precise contour of the face.
Step 4:
Create the outline of the eye that will be used to create the eye. Only one eye is visible in the side profile of the face. Eyes can be seen in this profile or angle in the second 3/4 of the face, but the right eye is smaller than the left. Additionally, we can see two identically sized eyes in the frontal view of the face.
The middle portion of both eyes is taught by some artists to be the same size, but in our 3/4 angle, we cannot use this trick or technique.
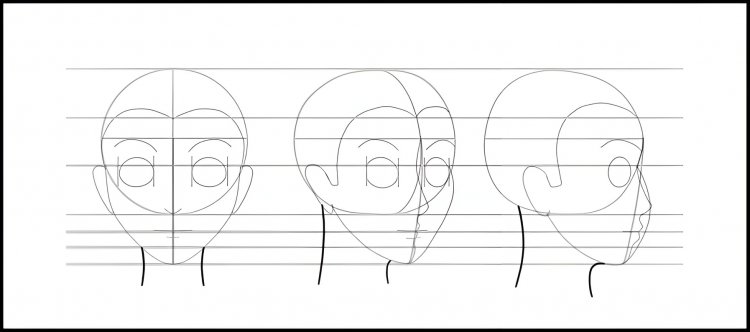
Step 5:
Using the bottom of the circle, sketch the anime's nose. Starting from the circle's middle line and moving downward, the nose is formed. Draw the nose in the manner shown in the illustration.
Step 6:
As seen in the image, draw horizontal lines to separate the middle portion of the nose and chin into three sections. The lips and mouth are guided by these lines.
Step 7:
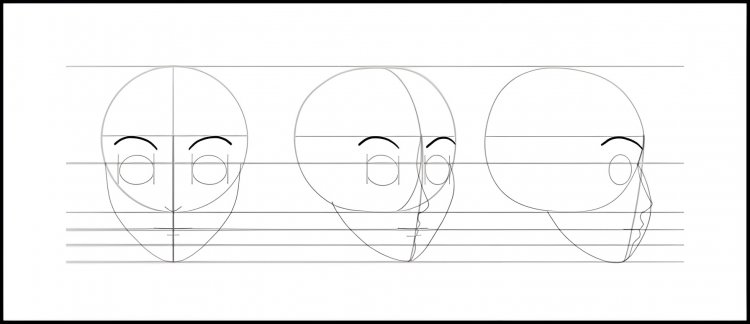
Utilising the three lines we drew in the preceding step, draw the anime's lips and mouth. Click the link below for more information about drawing lips in detail.
How to draw the mouth and lips in an anime. Now, draw the lips as shown in the picture.

Step 8:
Using the lines we created in the previous step, draw the anime eyebrows. Use the curve lines to draw the brows as shown in the illustration.
Step 9:
Utilising the precise guidelines for the placement of the eyes and nose in the art of anime illustration, skillfully bring forth the exquisite portrayal of anime ears. Through careful examination of the provided illustration, artistically render the ears with utmost precision, aligning them flawlessly in the centre of the aforementioned guidelines.
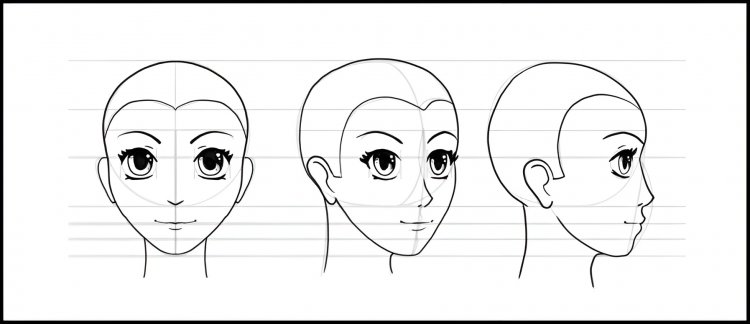
Step 10:
Using precise guidelines, carefully craft a perfectly straight horizontal line, thoughtfully aligning it between the eyes and the head. As you follow these expertly drawn lines, you seamlessly transition towards creating the hairline, mirroring the image before you. With meticulous attention to detail, let your artistic prowess shine as you skillfully bring life and depth to your creation. By skillfully utilising these guidelines as your foundation, an awe-inspiring masterpiece will take shape before your very eyes, capturing the true essence and intricacies of your subject.
Step 11:
In order to accurately depict the anatomy of the anime character, it is essential to skillfully sketch the elegant outline of their neck, incorporating delicate and graceful curved lines, as exemplified in the below image. By deftly manipulating the pencil with precision and finesse, one can capture the essence of this vital feature, elevating the visual impact of the artwork and imbuing it with a sense of captivating allure. The fluidity and curvature of these lines lend a lifelike quality to the character, allowing their unique persona to truly come alive on the page.
Step 12:
With the meticulous precision of a seasoned artist, carefully employ a dark-hued pencil to accentuate every curve and contour of the captivating anime visages before you. Having devoted ample time and unwavering attention to perfecting our portrayal, the rendition of these animated countenances now stands resplendent in its completion. Each stroke delicately and purposefully etched, it is with a sense of triumph and satisfaction that we witness the transformation of mere lines and shadows into an embodiment of animated artistry. Now, as we survey our creation, the allure and charisma of these anime faces are bound to ensnare the beholder with their unparalleled allure and expression.
What's Your Reaction?