How To Draw A Realistic Butterfly With Pencil Colours Step By Step
Sketchytips.com provides step-by-step instructions on how to sketch a butterfly. If it's your first attempt, then don't worry; here is proper guidance for you.
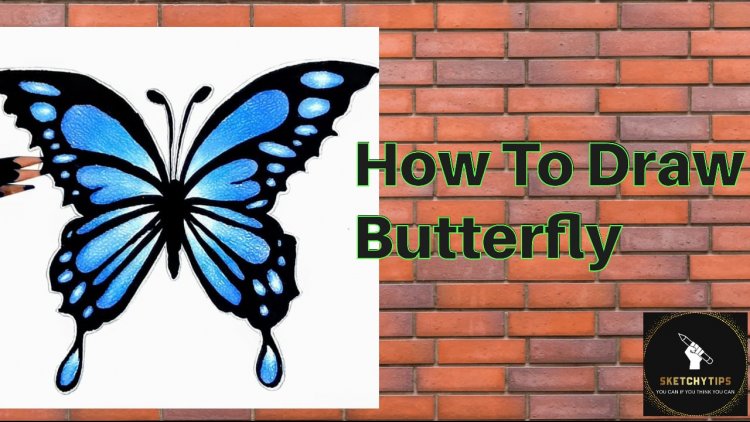
Today I am going to make a beautiful worm that is a butterfly. It attracts everyone with the beautiful colours of its feathers. So I also use colors to make it more attractive and beautiful. Making realistic butterflies with coloured pencils is a detailedprocess. Butterfuly has small lines in its wings. But don't worry! In this tutorial, I break down this difficult task into very simple steps. I hope that at the end of this tutorial you will be able to pull butterflies perfectly. But remember that practicing is better than just listening. So keep practicing to make your work look like a pro. Let's start our lesson
Materials Needed:
- Drawing paper
- Pencil colours
- Sketch pencil
- Marker
- The cleaner
- Schepner
Place all these supplies on your desk, grab your sketch pencils, and follow the steps I've given.
Section 1: In this section, we will learn how to draw an entire body of butter using simple steps. that will help us draw the realistic butterflies perfectly.
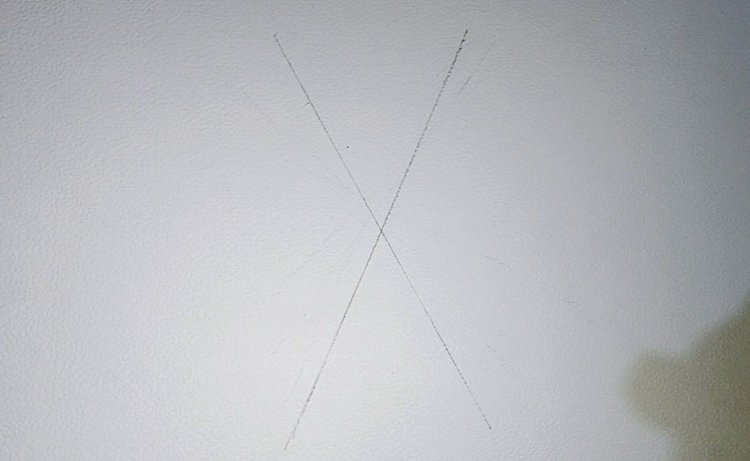
Step 1:
Draw two cross-lines. On paper, this will help you draw the top and bottom sections.
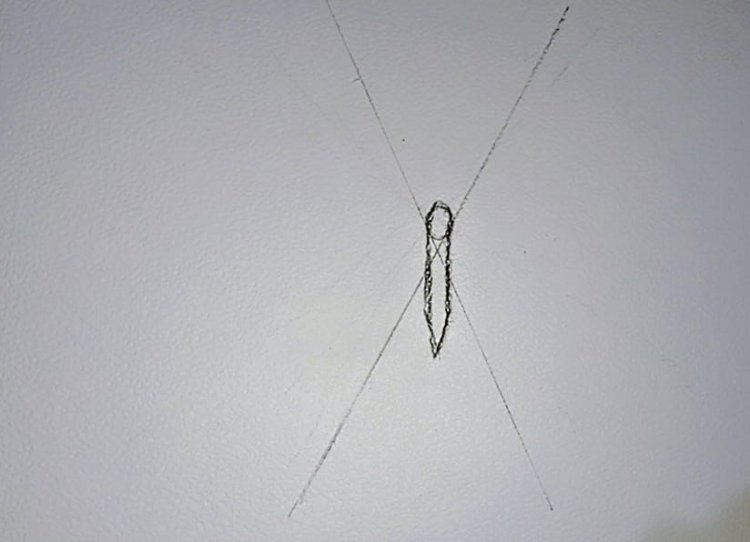
Step 2:
Draw the butterfly's body and face using the centre point of these two lines, which meet. Draw a face with a circle, a body with two straight lines, and a belly with a sharp edge.
Step 3:
In this step, draw the front and back of both wings using these cross lines. Sketch using the line as I draw in this picture.
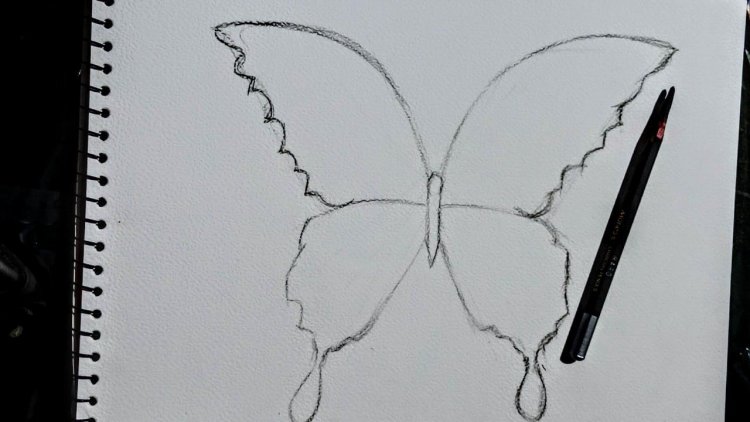
Step 4:
In this step, draw the butterfly's antennae with two carve lines.
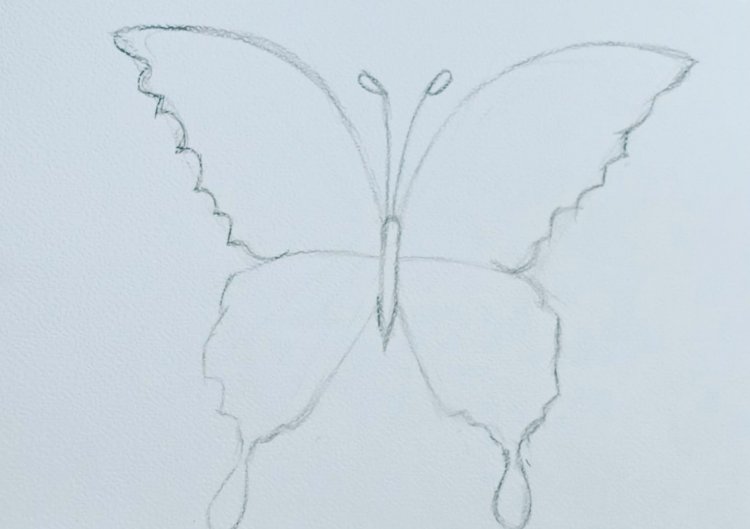
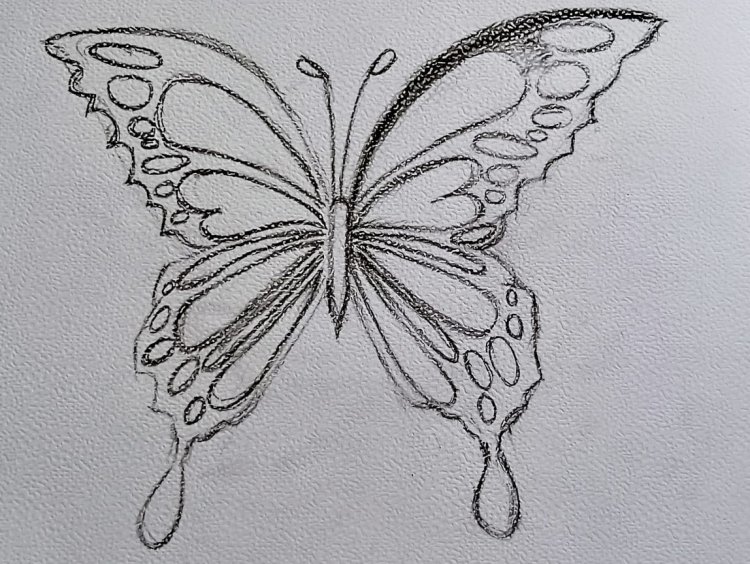
Step 5:
In this step, draw the inner veins of the wings in my drawing dots or other designs, as you see. These internal veins consist of lines. It's very difficult, but as I draw, you try to copy it exactly. Now that our drawing structure for Butterfuly is completely ready for colouring, let's start colouring.
Section 2: In this section, we will fully colour our beautiful butterfly. In fact, the act of colouring brings our drawings to life. This means that when we colour our drawings, they look very realistic and professional. And in my words, I say that the act of colouring brings my art to life. Colour is a powerful way for artists to communicate and enhance drawings, making them a fundamental element in the world of visual art and its beauty. So, let's start colouring our butterfly completely.
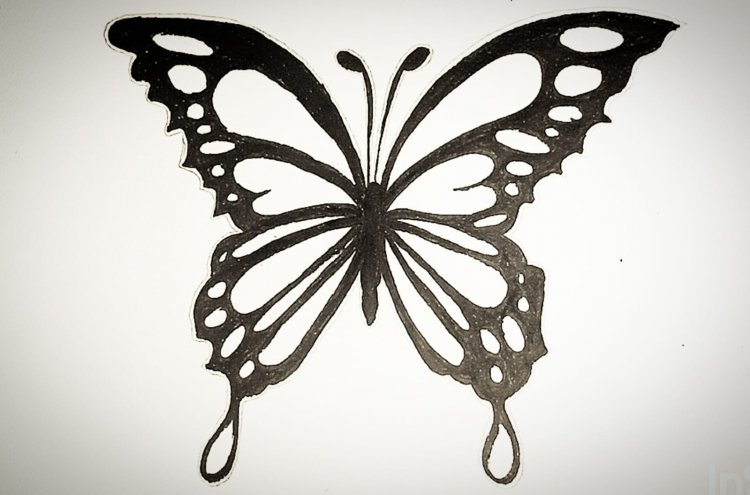
Step 1:
Outline the entire butterfly with the marker and fill in the dark areas as well. Then erase the previous pencil outline.
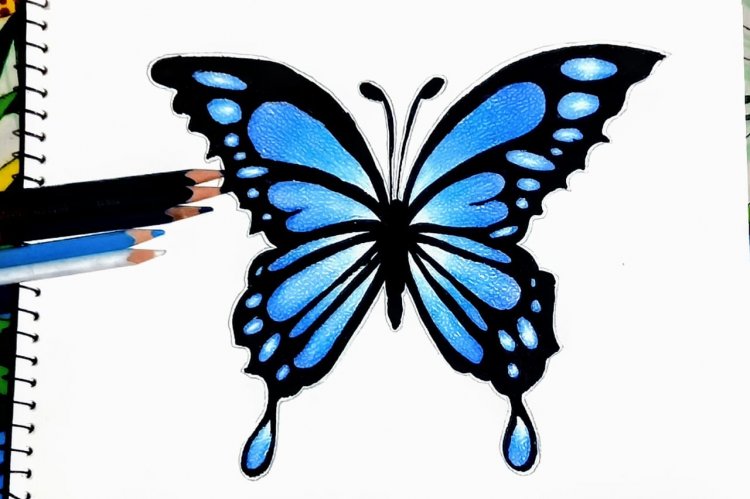
Step 2:
Take the blue color. You can choose your favourite pencil colour instead. Then shade or fill in specific areas. If you don't understand, I try to explain to you that I look at my butterfly drawing as a whole and colour it the same way I coloured my drawing. Now our beautiful butterfly drawing is complete.
I hope you enjoyed the tutorial and learned something new. If you want to learn something more interesting and something new about drawing, then visit my website, sketchytips.com, and we will meet in another informative tutorial about your interest in drawing.
What's Your Reaction?