Here Some Easy Steps To Draw Anime Drawing Or Sketch:
Sketchytips.com provides how to sketch anime drawings step by step. If it's your first attempt, then don't worry; here is proper guidance for you.
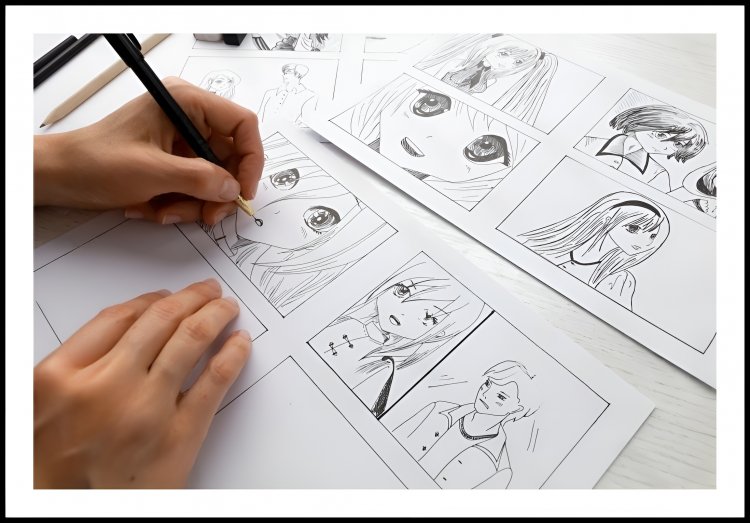
I'm going to demonstrate how to draw the best anime sketch for you today. It's enjoyable to draw anime. I love creating anime. Both charming and powerful animation can be seen in anime. I hope you watch anime and read anime comics. You will also have a favourite anime character that you adore. I'll give you some easy techniques in this article that you can use to draw your favourite anime character. If you follow this guide, then you'll be able to make the anime characters that you like the most. Animations that are currently popular in Japan include anime and manga. It's a Japanese character from animation and comics. This animation and comic are immensely popular among kids and even teenagers. I sincerely hope you enjoy this essay if you are a fan of this anime. However, if you want to master pulling it precisely, you must practise and attempt it often until you do. Getting better with practise The adage has been said often; now is the time to put it into action. Because you won't be able to do anything without practise. If you keep practising, your work will undoubtedly improve, and you will become more professional with time. I'll share with you all of my drawing experiences. to instruct you in plain terms. Let's start now!
Material:
- Paper sheet
- Paper stump for blending.
- 2HB pencil for drawing basic structure.
- 4B, 5B or any dark shade of pencil you have.
Step 1.
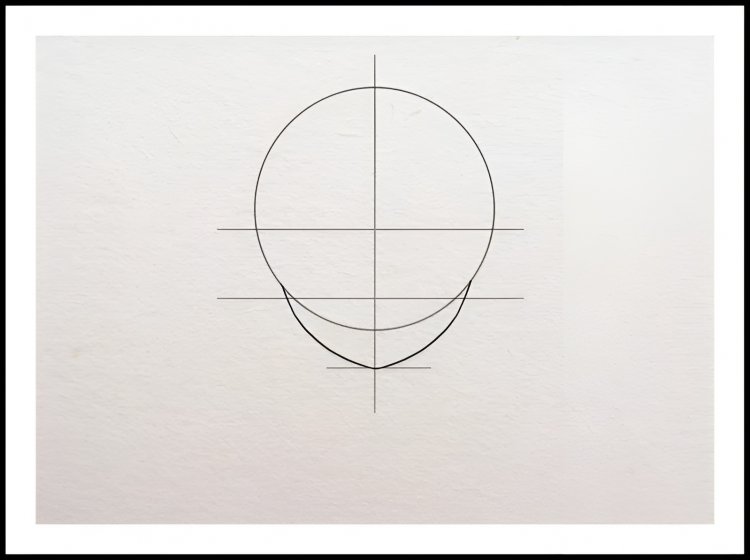
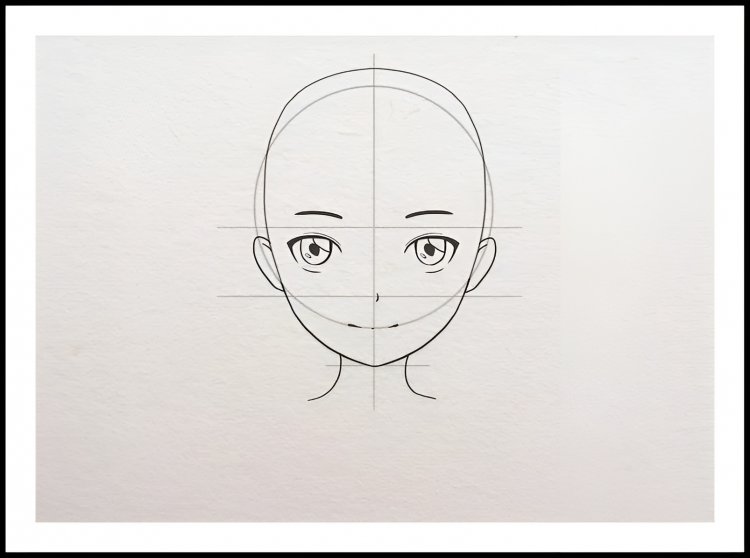
Draw a circle in this step, and in the centre of the circle, draw a horizontal line. This line aids in creating a straight sketch. And the amine’s head is represented by this circle. You use a 2HB pencil to draw all of these lines. We chose this lighter pencil so that we could easily erase it for our final steps.
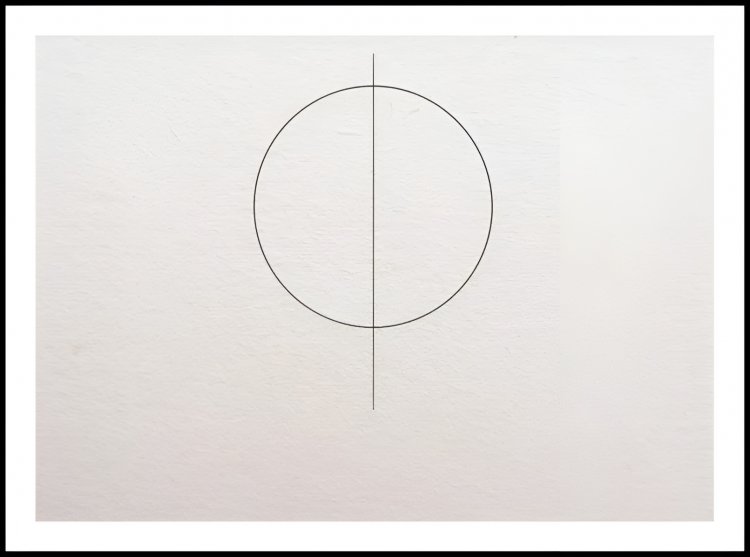

Step 2:
Draw a vertical line in the middle of the horizontal line and circle. It is the guideline of the eyebrows.


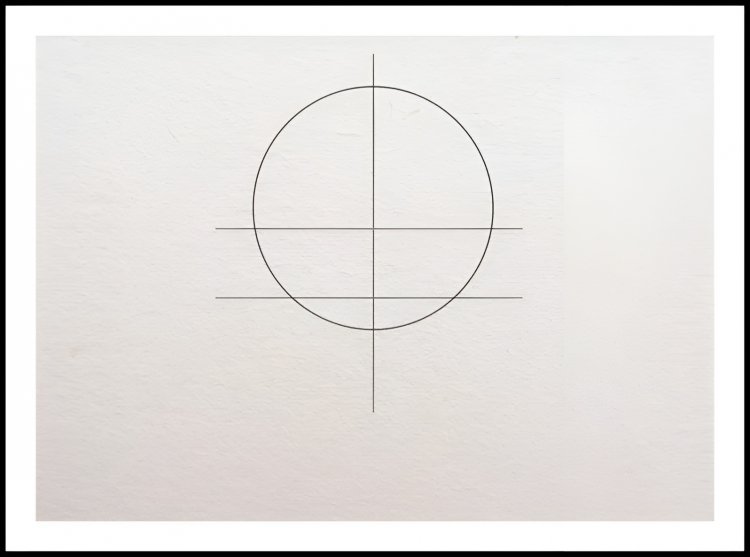
Step 3:
Again, draw a vertical line on the lower side of the previous vertical line, like in this image. These two vertical lines are actually the guide lines of the amine’s eyes. I will draw eyes in the middle of both lines.

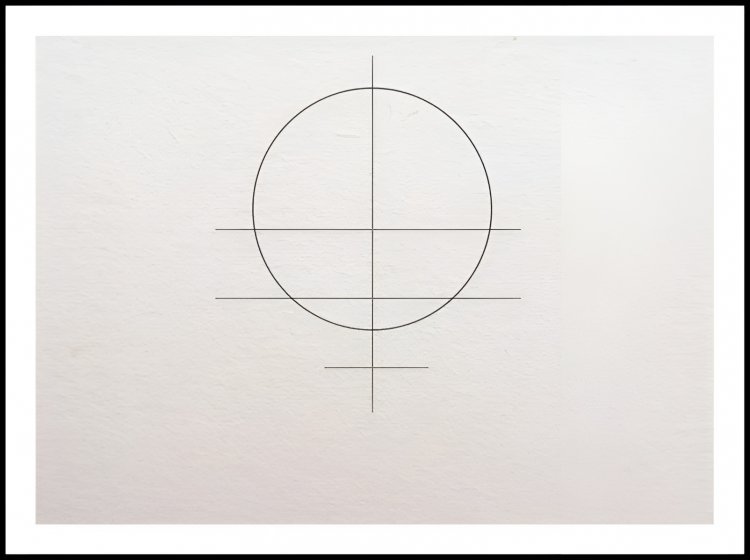
Step 4:
Draw a small vertical line at the bottom of the circle. It is the guide line of the chin. This line will help us draw the chin easily.

Step5:
Draw a curved line at the bottom of the circle, as you can see in the image. It is the joining line of the anime face.

Step6:
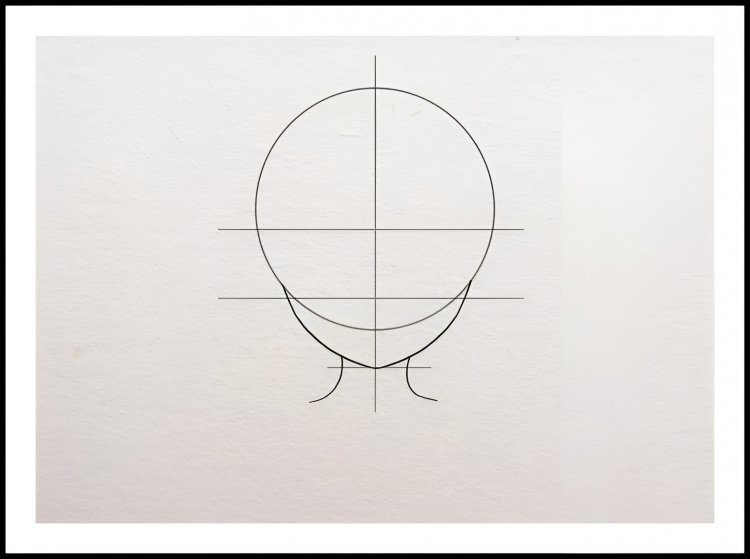
Draw the neck of the anime using curved lines.

Step7:
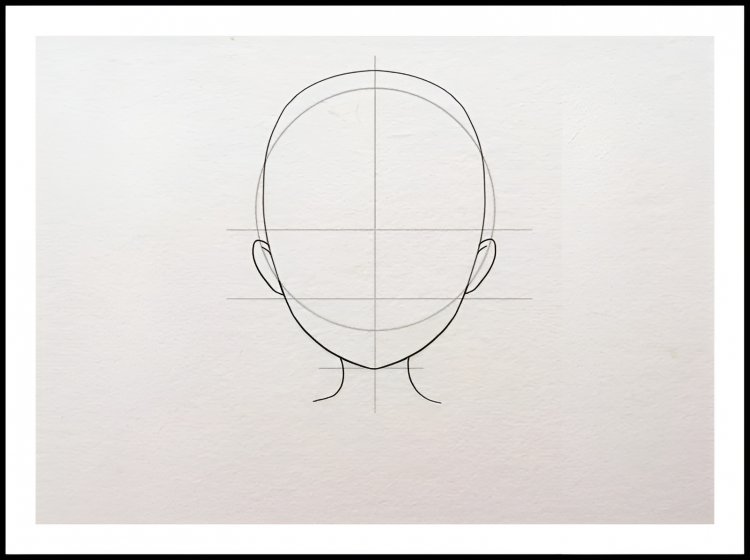
Draw the ears of the anime. You draw ears using those lines, which we drew in the second and third steps. You draw ears on the left and right sides of the circle. And also correct the shape of the face, as you see in this image.

Step8:
Draw a nose in the middle point of the second vertical and horizontal line. You draw a nose with a small curved line.


Step9:
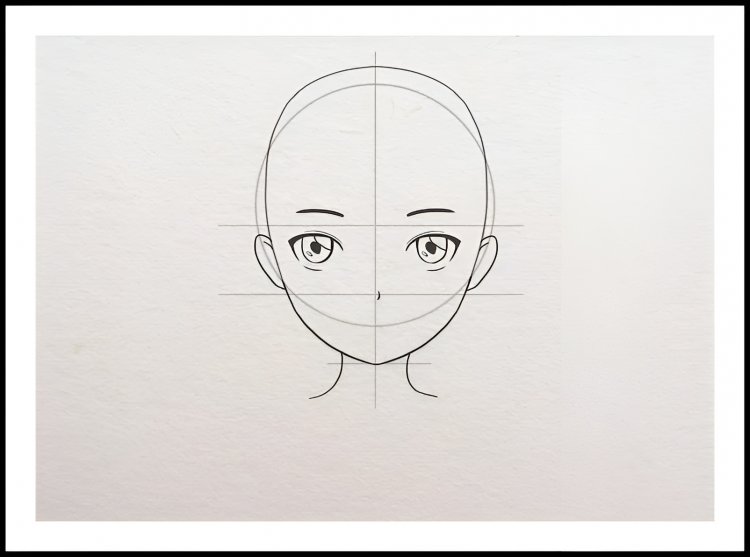
In this step, you draw the eyes of the anime using two vertical and one horizontal guide line. If you can learn to draw eyes, you can visit my website; otherwise, I link to the article on the eyes; you just click on it. And learn how to draw anime eyes.


Step10:
Draw the eyebrow of the anime using the upper vertical line. You draw an eyebrow at some distance from this vertical line, as you can see in the image.

Step 11:
Draw the mouth of the anime using the lower side of the circle, as you can see in the image.

Step12:
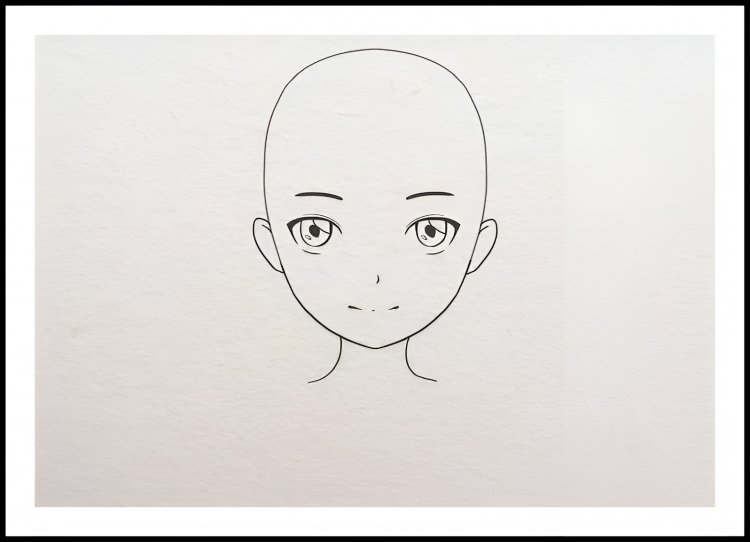
In this step, erase all the guidelines that helped us draw every part of the face.

Step13:
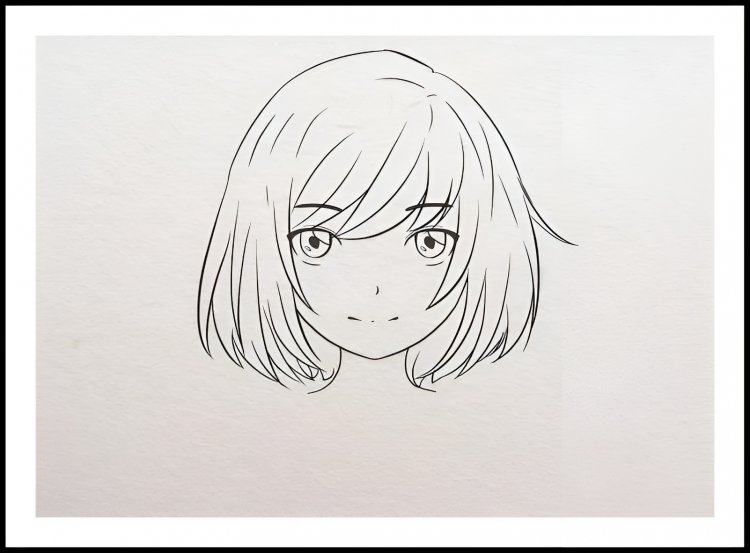
Draw the hairs of the anime using stroke lines. There are many styles of hair, but this is the most famous and mostly makeable style, so that’s why I chose this style of hair. If you want to learn how to draw hairs in detail, you can check out this article that I linked on the subject. You just click on the link and learn how to draw the hair of an anime character.

Step14:
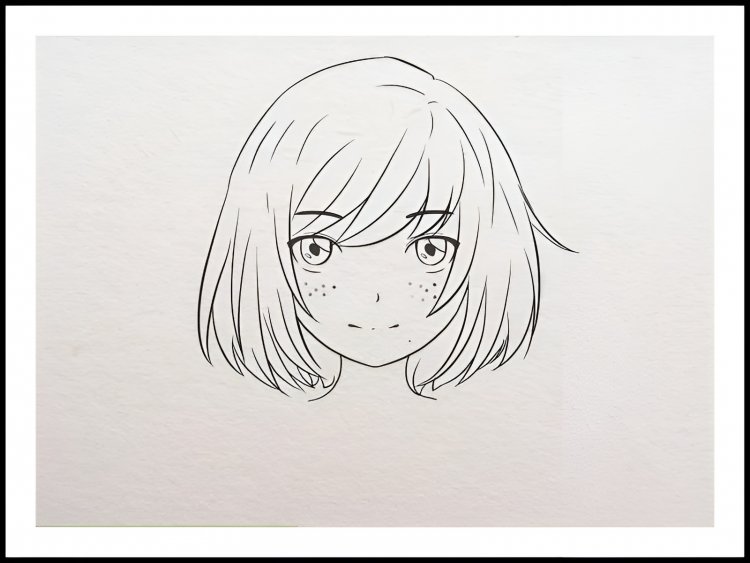
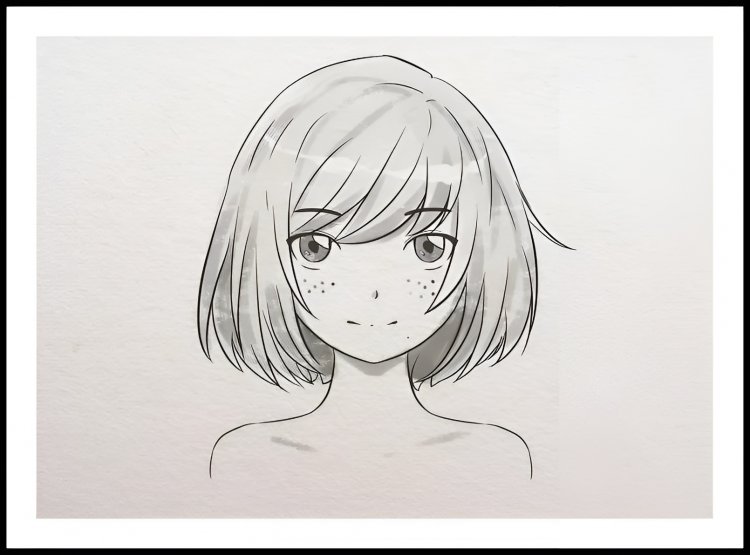
Draw freckles and wrinkles on the anime face to make it more beautiful. I draw some dots on the lower side of the eyes. To give it a realistic look.

Step15:
In our last step, we blended some areas of the face. I blend hair, the nose, under the jowl line, and the eyes. Firstly, you have to use a dark pencil and draw lines that we can blend. You should hold this pencil at its last tip. And draw slowly without applying pressure. Then you use a paper stump and apply it to the required areas of the face with a smooth hand. Your work is more productive as a result.

End:
I hope you enjoyed reading this article, learned something new, and were inspired to create your own stunning anime face. I also hope you approve of the way I teach. OK bye! We will meet again in another article.
What's Your Reaction?