Learn how to draw beautiful Mountain Drawing.
Sketchytips.com provides step-by-step instructions on how to sketch mountains. If it's your first attempt, then don't worry; here is proper guidance for you.
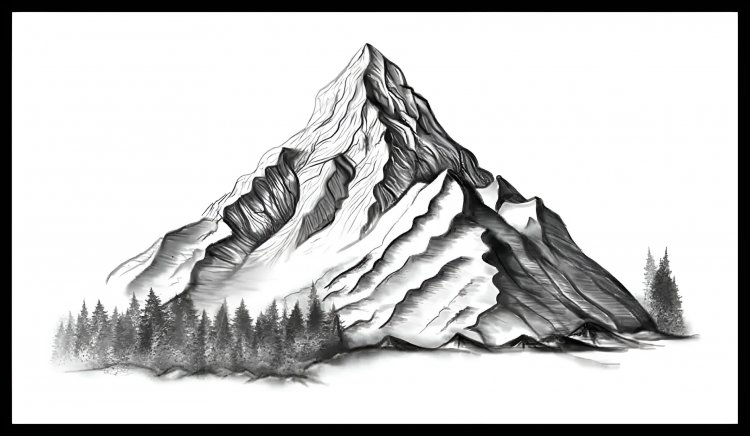
Congratulations on taking the initial steps toward becoming an expert mountain illustrator! Prepare yourself for an artistic trip that will enhance your abilities. Remember to learn from your mistakes as you start this session and approach each shot with a blend of patience and curiosity. Try out various approaches and stances. Take note of the mountain's lovely characteristics, such as its winding valleys and towering summits. You will feel confident that you can capture the spirit of the mountains on paper by the end of this drawing workshop. Mountain-drawing is entertaining and artistic. A tutorial on how to draw mountains is provided below:
Assemble resources
Paper: Choose something suitable for your sketch. It is best to use sketchbook paper or stronger paper.
Stock different pens like HB, 2B, 4B, and 6B to create different shades and textures.
Eraser: Use a soft eraser to correct mistakes or remove extra lines.
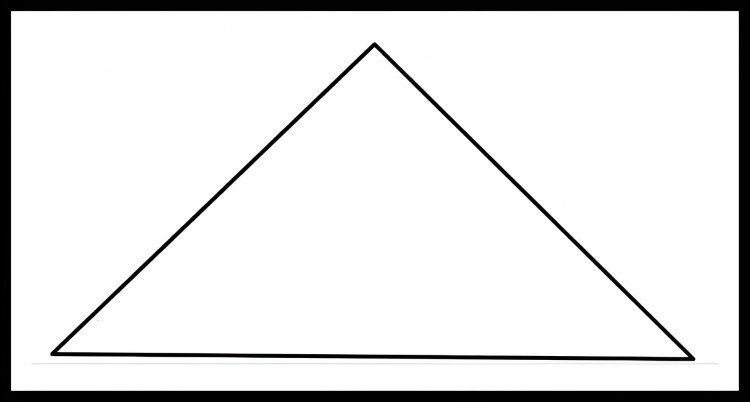
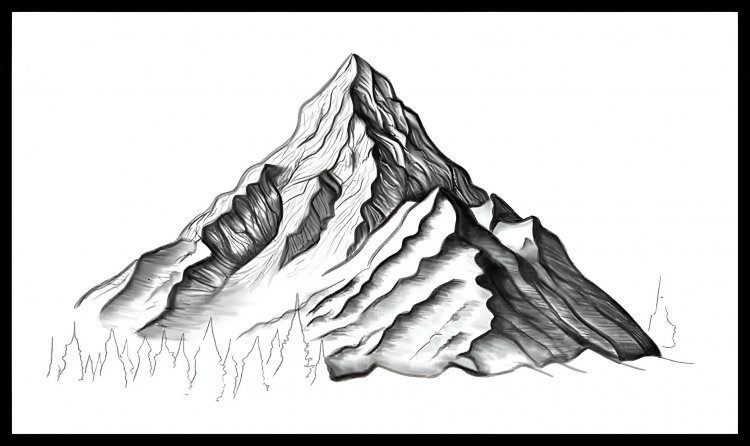
1: The main shape of the first mountain drawing creates an original triangle.
To the left of the baseline, draw an upward-sloping line starting from the baseline and ending above the baseline. Then draw his second line to the right from the end of the first line, forming a triangle. Here is the first summit. Drawing a giant triangle outlining the basic outline of a mountain is the first step in this lesson on creating mountains.


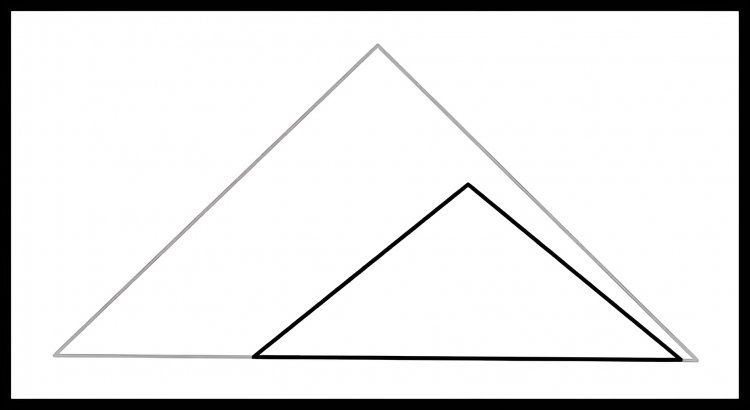
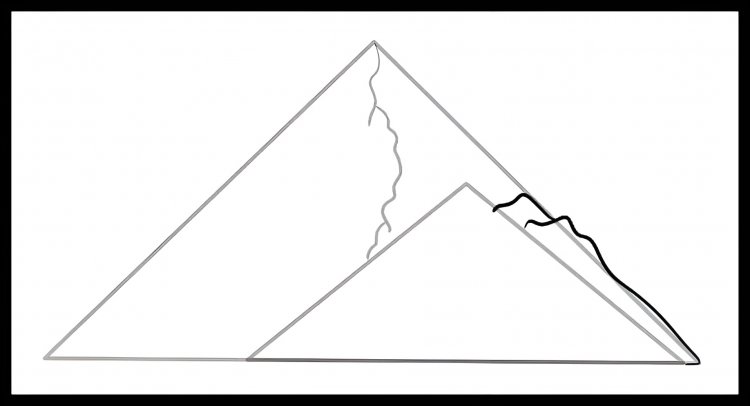
2:Create a triangle to draw the Second mountain
Draw a second, smaller triangle inside the first triangle to symbolise the main outline of the second mountain. To create the corresponding mountain shape, make the second triangle slightly higher or shorter than the previous one. To complete the mountain range, connect the intersection points of the triangles with lines.


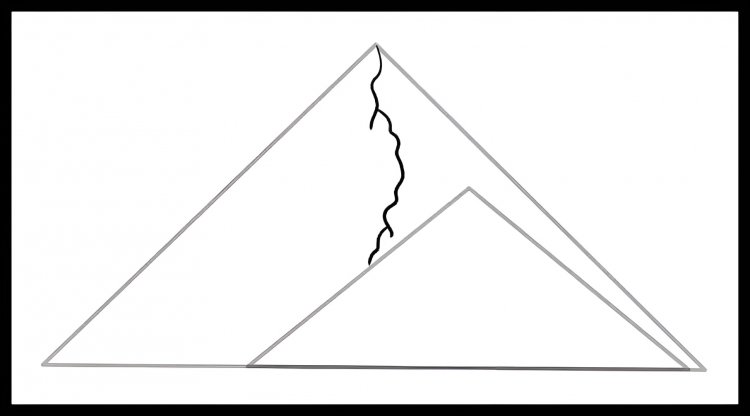
3:Divide the first triangle in half.
Inside the first huge triangle, note the approximate centerline. The mountain artwork can be divided into portions for your benefit.


4: Identify Side Bumps
Draw the first few side bumps, using the large triangles as starting points and ending with smaller triangles.


5:Outline mountains
Use triangles as guides to outline mountains, large and small.
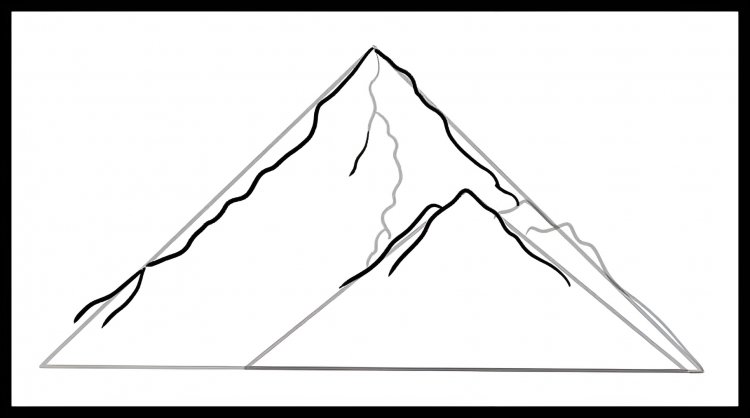


6:Great Mountain Structure
Draws jagged, downward-pointing fine structure lines in a large mountain.
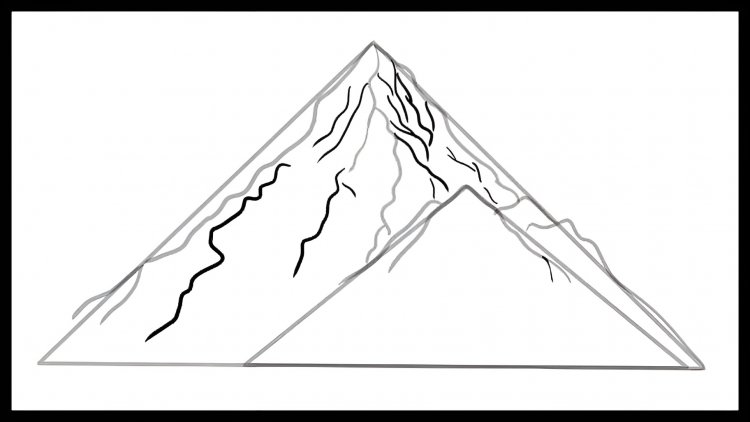


7:Tiny mountain peaks
Draw structural lines both fine and coarse on the little mountain below. The centerline should be a dividing line so that the angle points down on both sides. When finished, remove any lines that are still under construction.
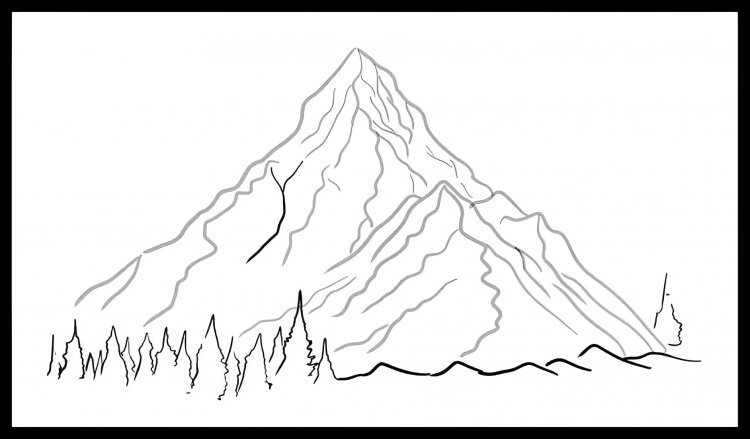

8: Sketch a local scener
Make a lovely slope at the foot of a tiny mountain first.Near the back half of the mountain, outline a simple, spiky, rough-textured tree.

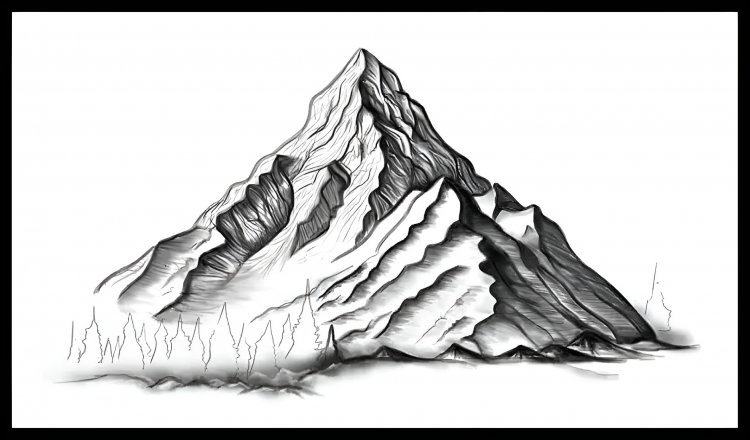
9: Shade the mountain in your drawing.
A thin, soft brush and black paint are used to subtly shade the mountain's shape. Softly blend the remaining jagged hills and softly smooth the shading using a blending brush.


10: The most realistic mountain texture drawing At this stage,
You use a thin brush and white paint to add fine brushstrokes on the top of the mountain to improve the structure. Apply grey and black paint again. Continue texturing the realistic mountain drawing. To paint the rest of the large pile, repeat the previous process, this time using mixed grey and black paint.

Continuing to apply hair-thin brush strokes, you follow the contours of each hill in these areas.

Add texture to the mountain sketch. To enhance the texture of small peaks and jagged hills, use a thin brush and black paint and add finer brush strokes to the hillline. Then use a soft brush to gently shade the area.

11: Shade the foreground with
At this stage, use a delicate brush and black paint to create blurry shades along the foreground lines. To spread and soften the shading, switch to his Blending Brush.

12:Shade Your Mountain Sketch With Trees
Shade the trees with a coarse, pattern brush and black paint. Make sure that each tree's top is darker than its lower portions.
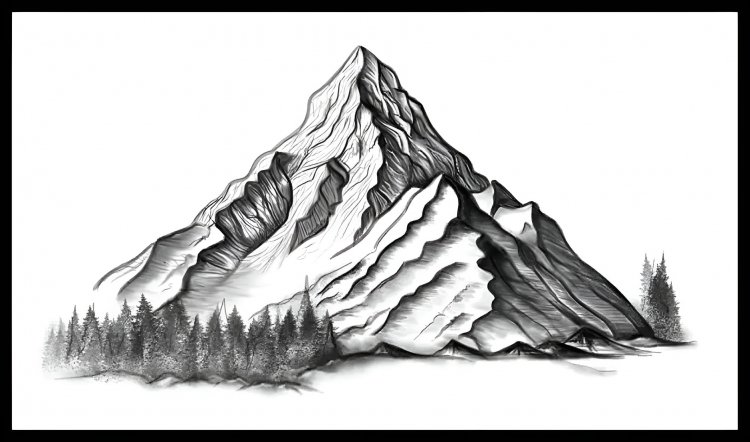


13:Complete the realistic mountain drawing.
Our mountain drawing guide journey is almost complete. Simply delete any remaining hard limits or construction lines, and your drawing is complete. This creates a smooth and accurate mountain drawing.


Keep in mind that this is just a basic guide, and you can experiment with different triangle sizes, shapes, and styles to create unique and interesting mountains. Draw, play, and practise!
What's Your Reaction?